Zapier is an online automation tool that has gained popularity in recent years for integrating and connecting different apps and services to automate workflows. With Zapier, you can create “Zaps,” where you define “Triggers” to set the timing of integration, and “Actions” to specify the actions to be performed.
For example: If I want Zapier to backup photos I upload onto Facebook in Google Photos, the “Trigger” is “uploading photos to Facebook” and the “Action” is “backing up photos to Google Photos.”
If you’d like to use this feature, you can select “Connect With Your Web Apps” under Tools:
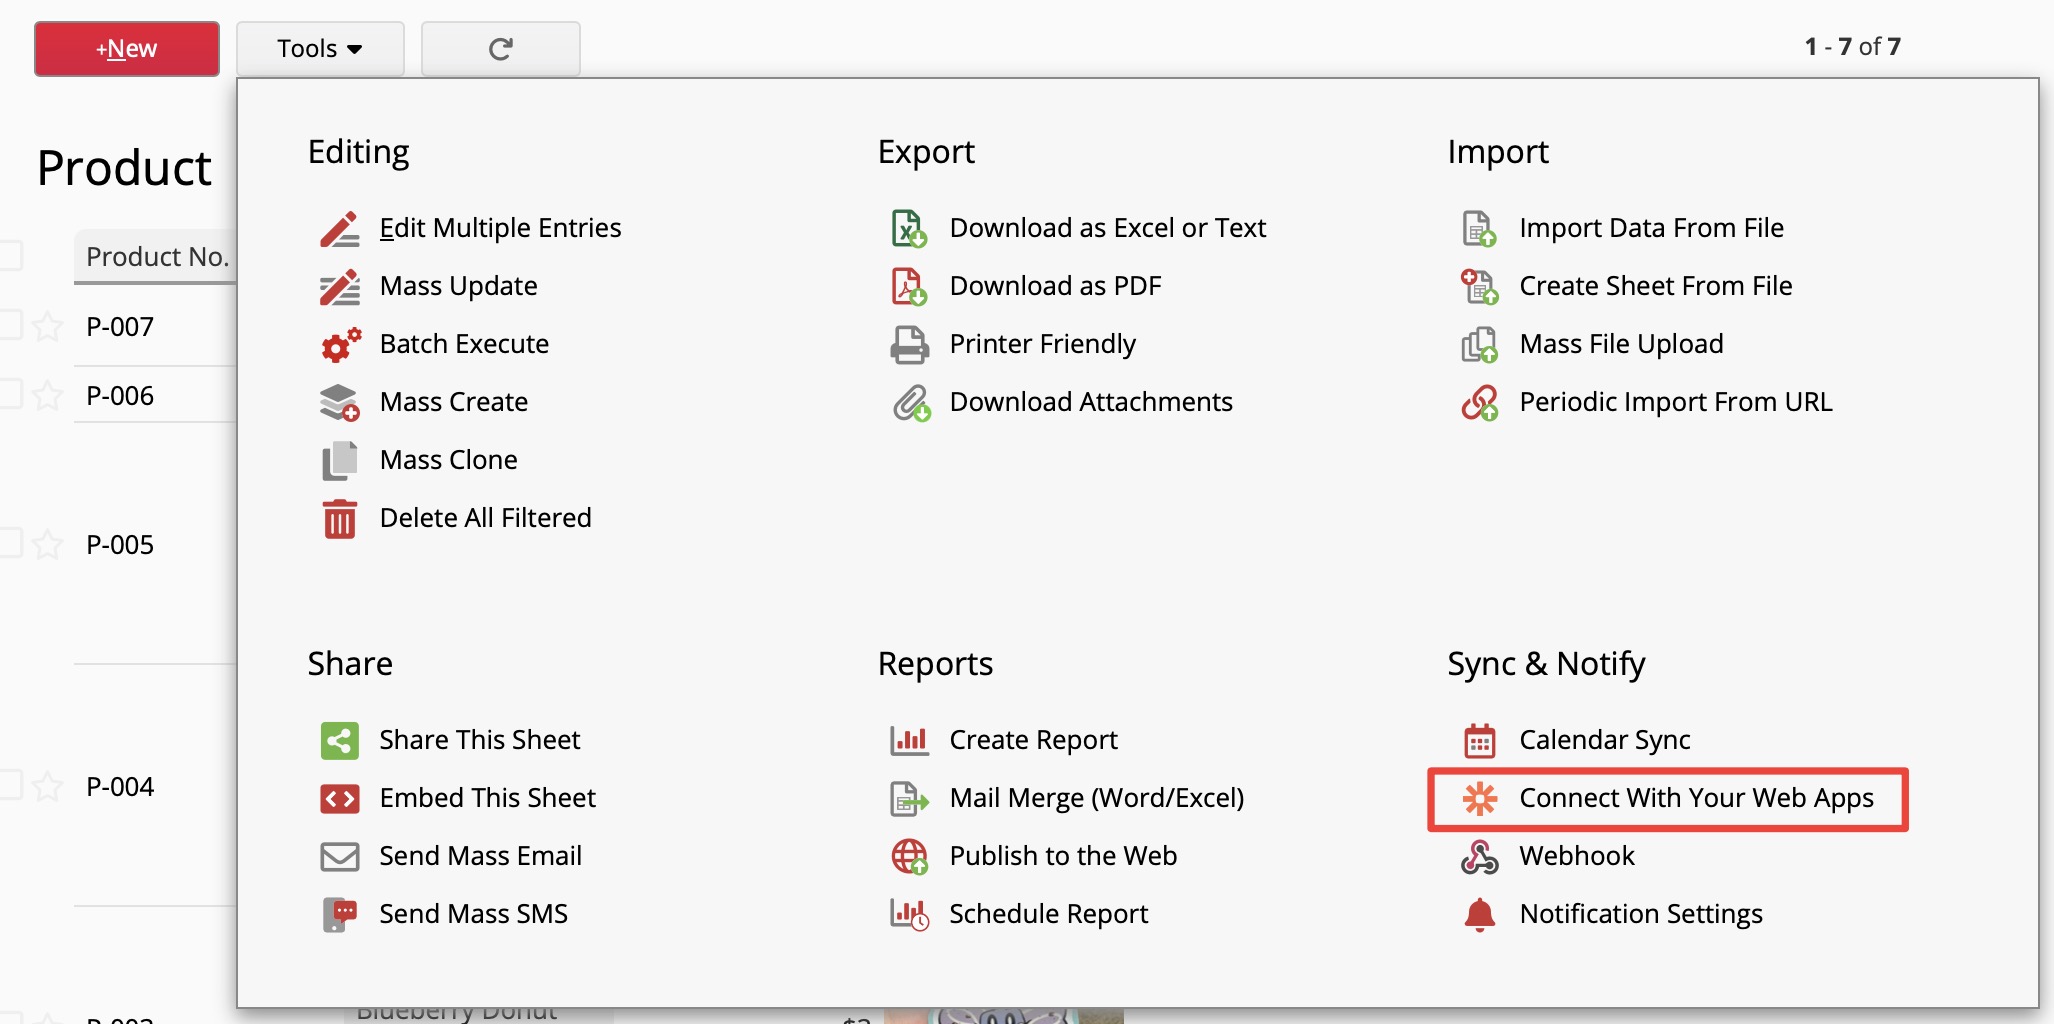
The system will provide you with suggested Zap templates for Ragic. If none of these templates contain the application you wish to integrate, you can also create it directly on the Zapier webpage! The following sections of this article will demonstrate how to apply a Zap template and create a Zap from scratch.
After selecting “Connect with Your Web Apps,” the system will provide the following templates:
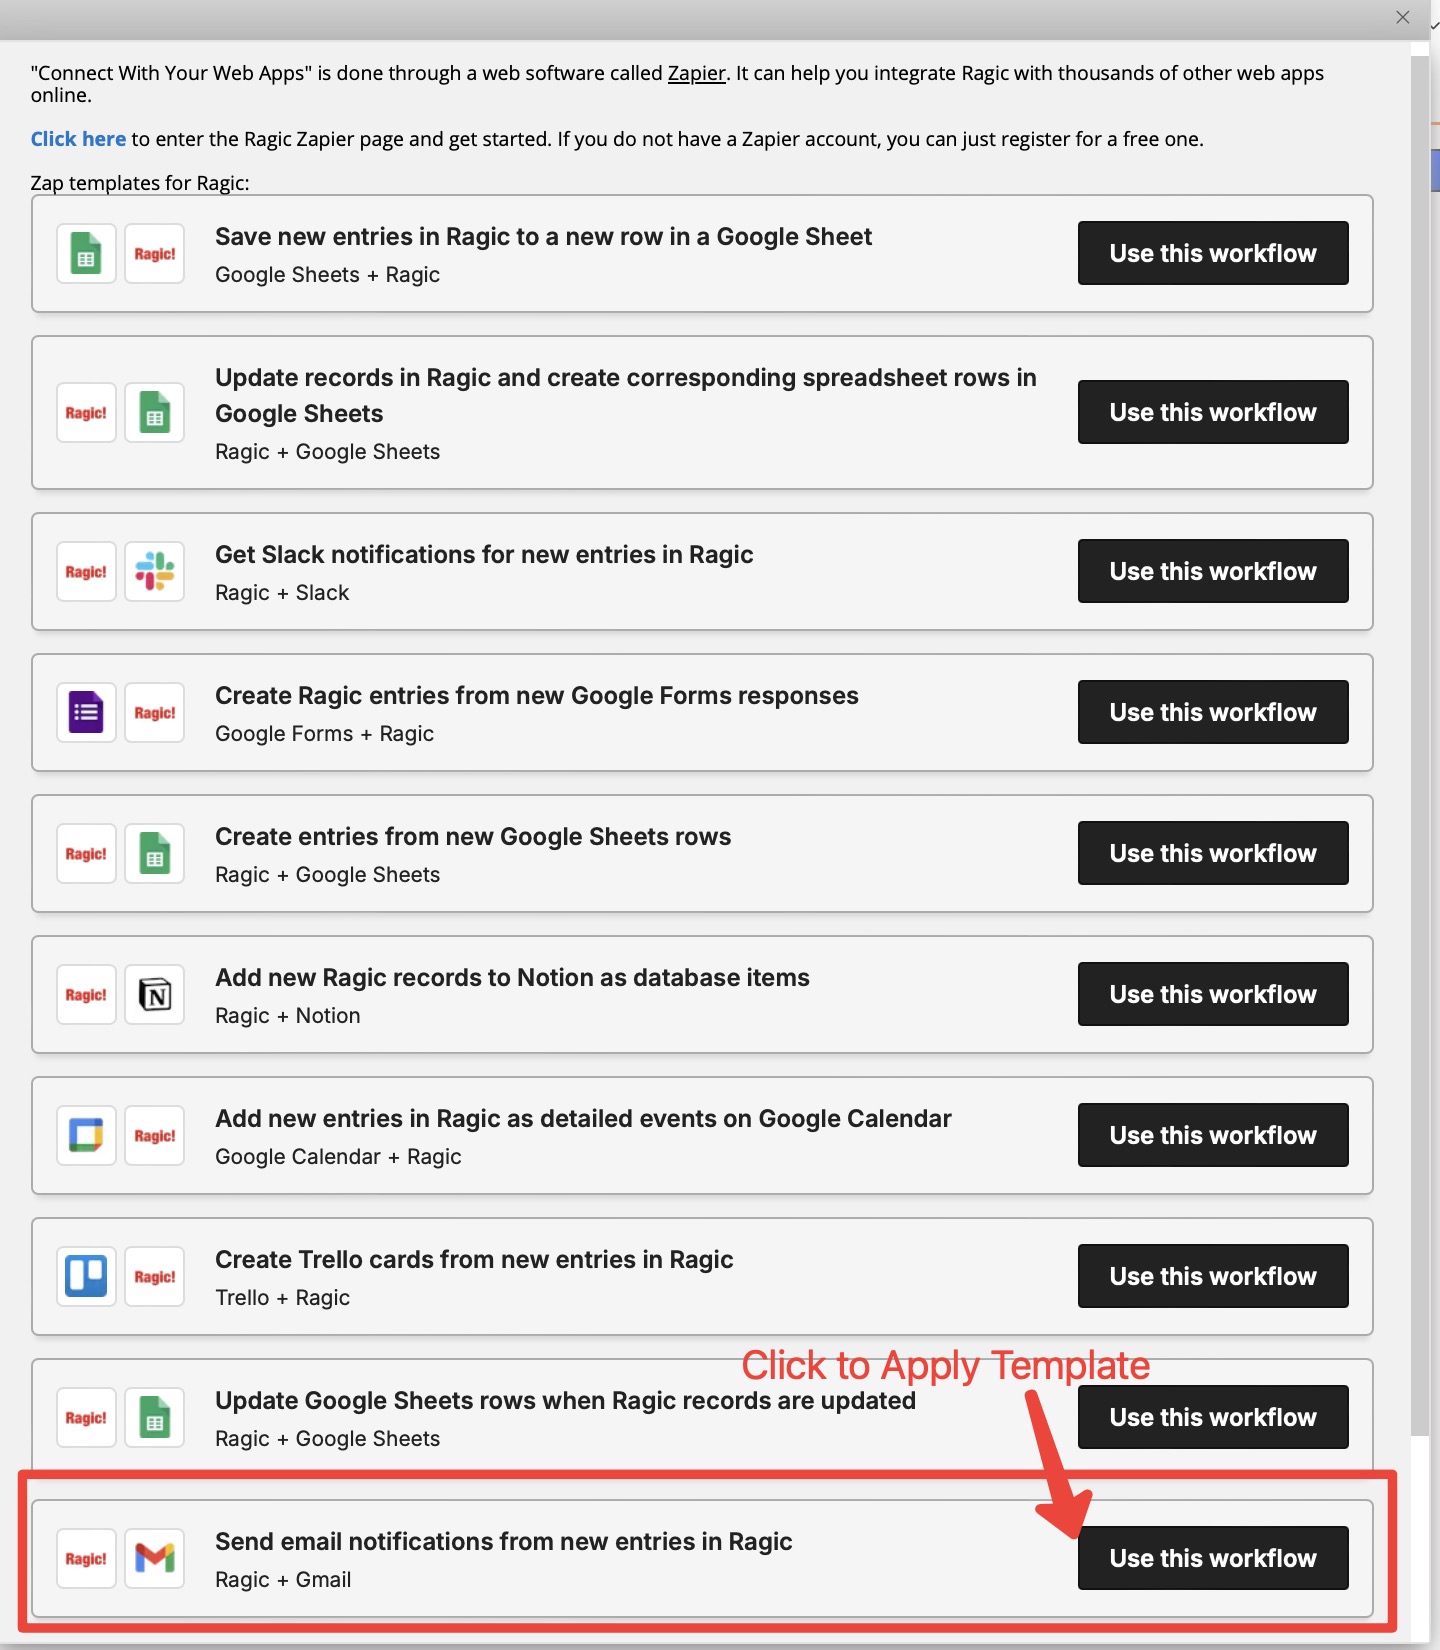
After clicking, a template for the selected application and action will automatically be created:
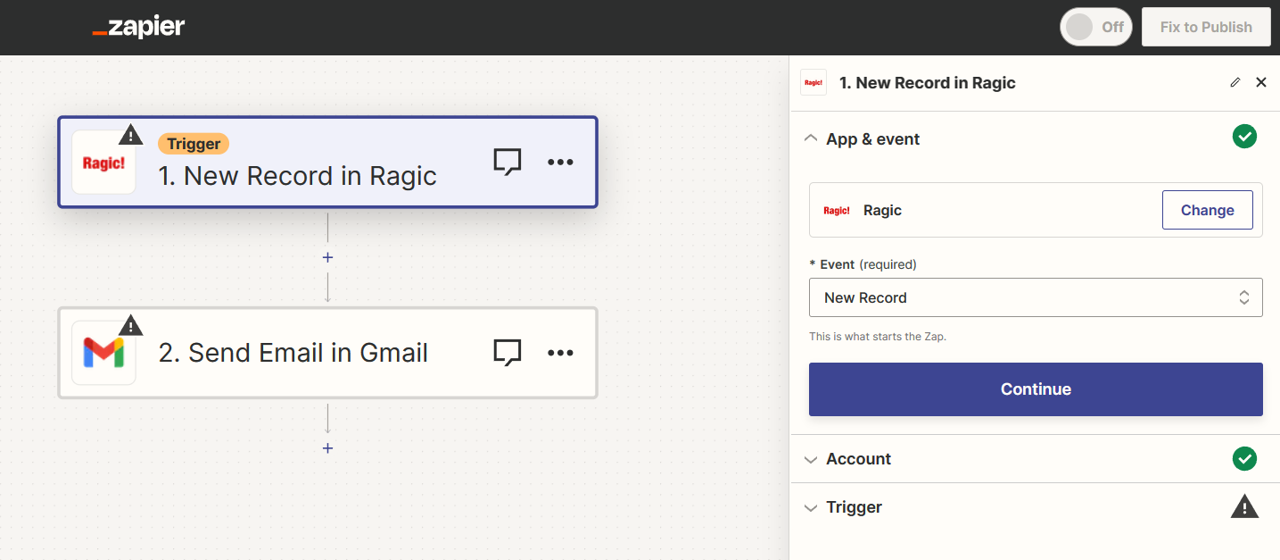
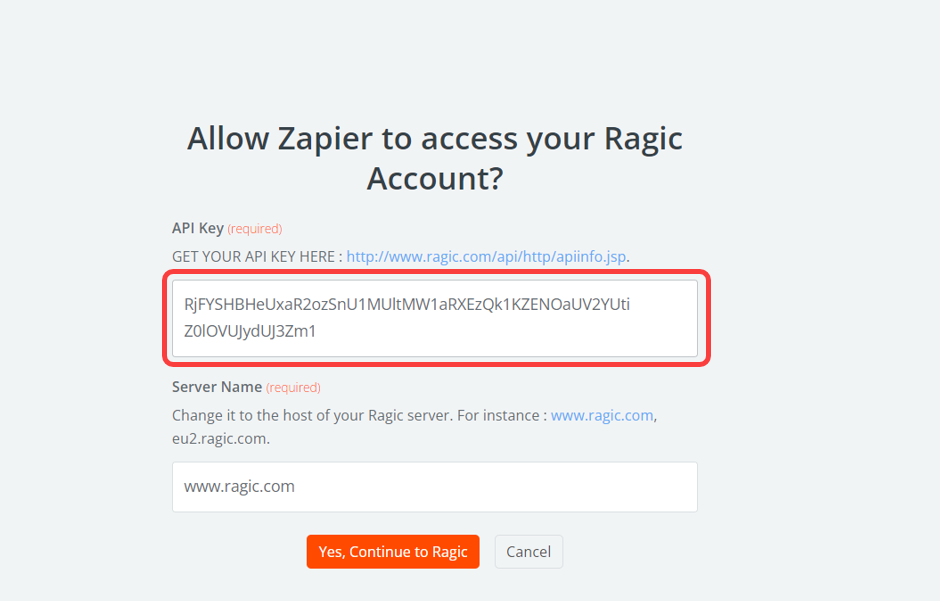
Next, the system will ask you for the API Key of your Ragic account.
You can find your API Key under Personal Settings.
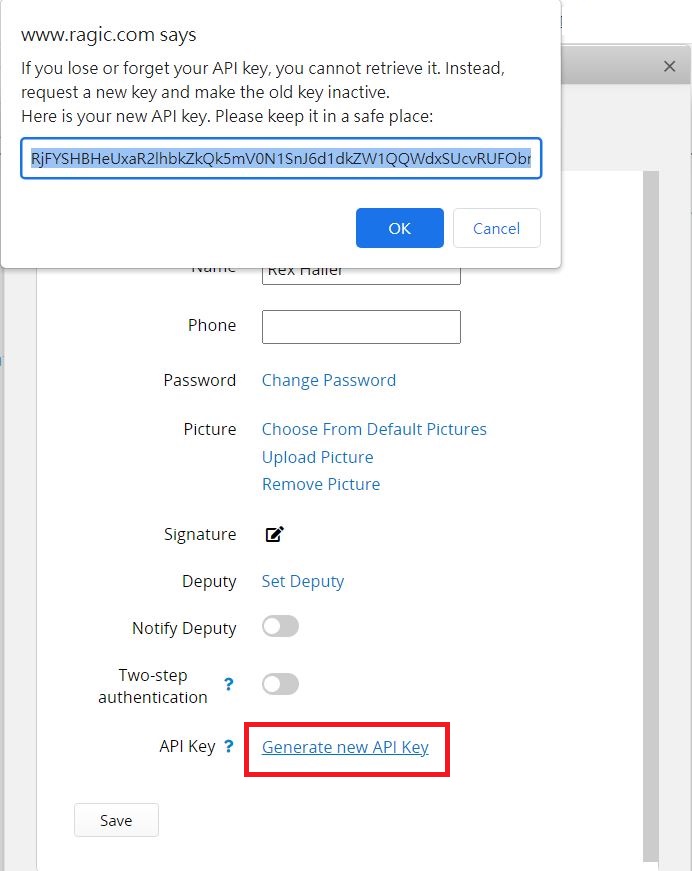
And fill the API Key into Zapier and enter the Server Name below (for example: www.ragic.com, ap10.ragic.com, na3.ragic.com).
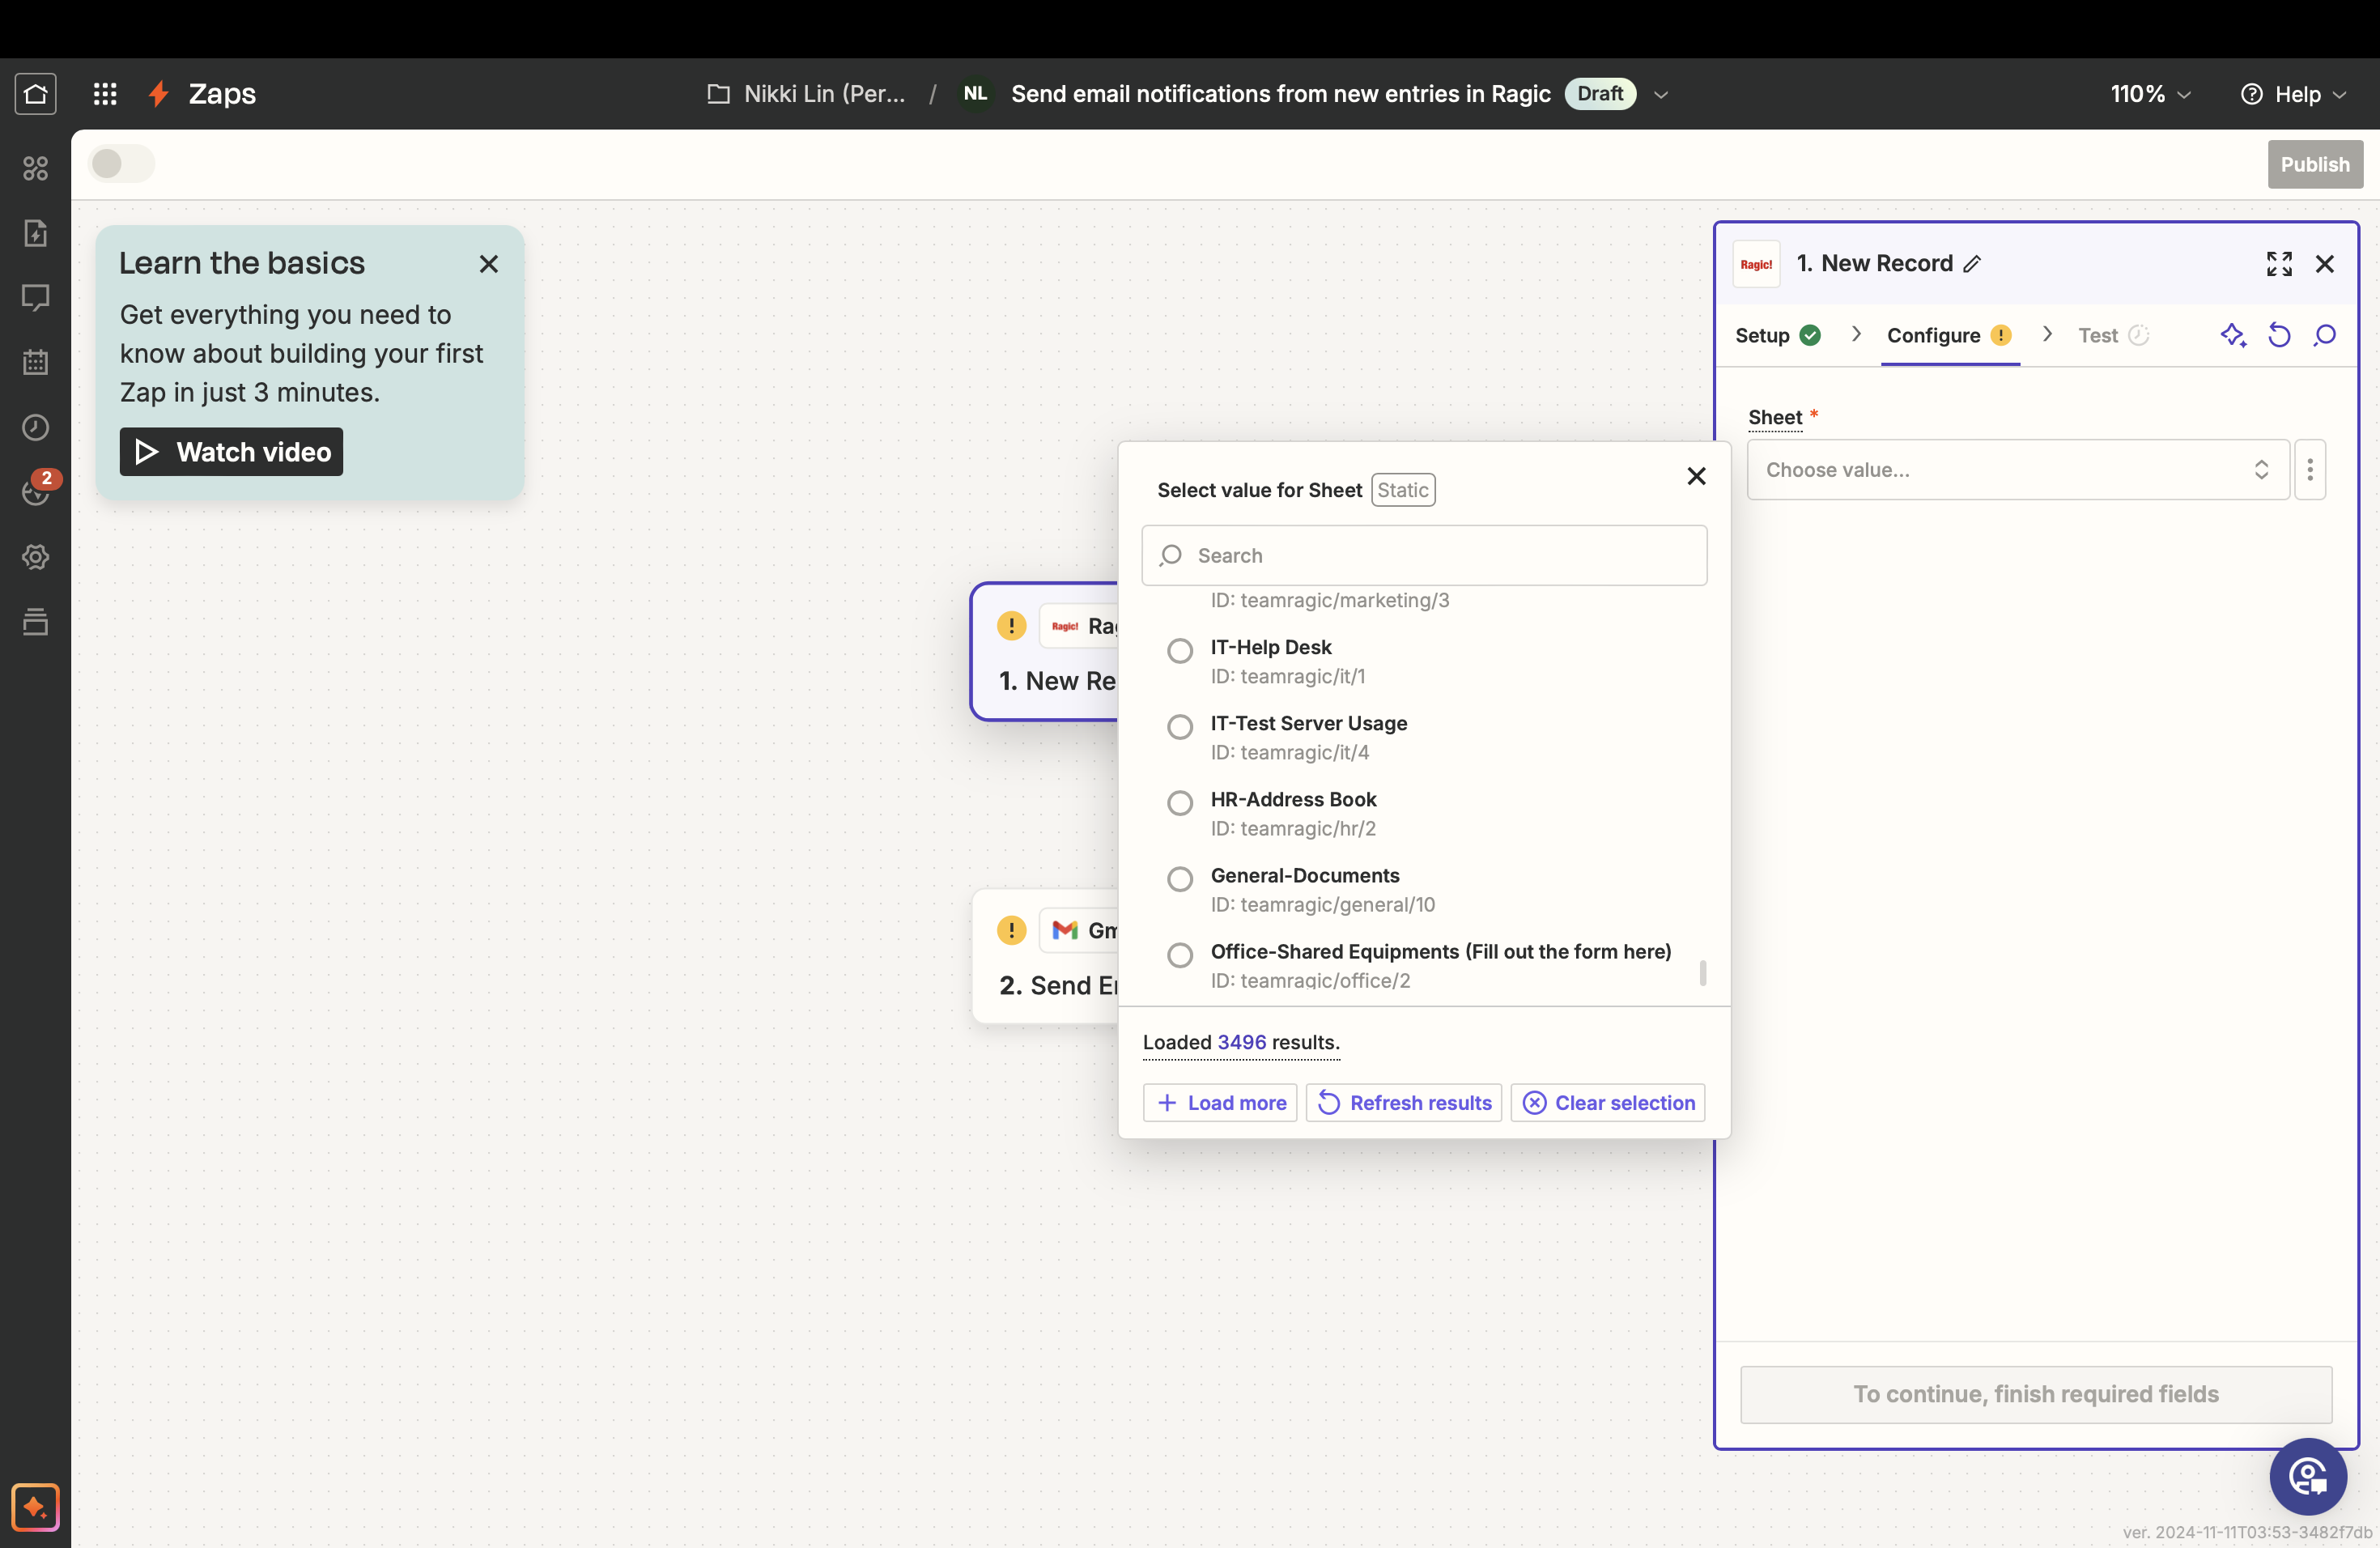
Select the sheet you wish to integrate:
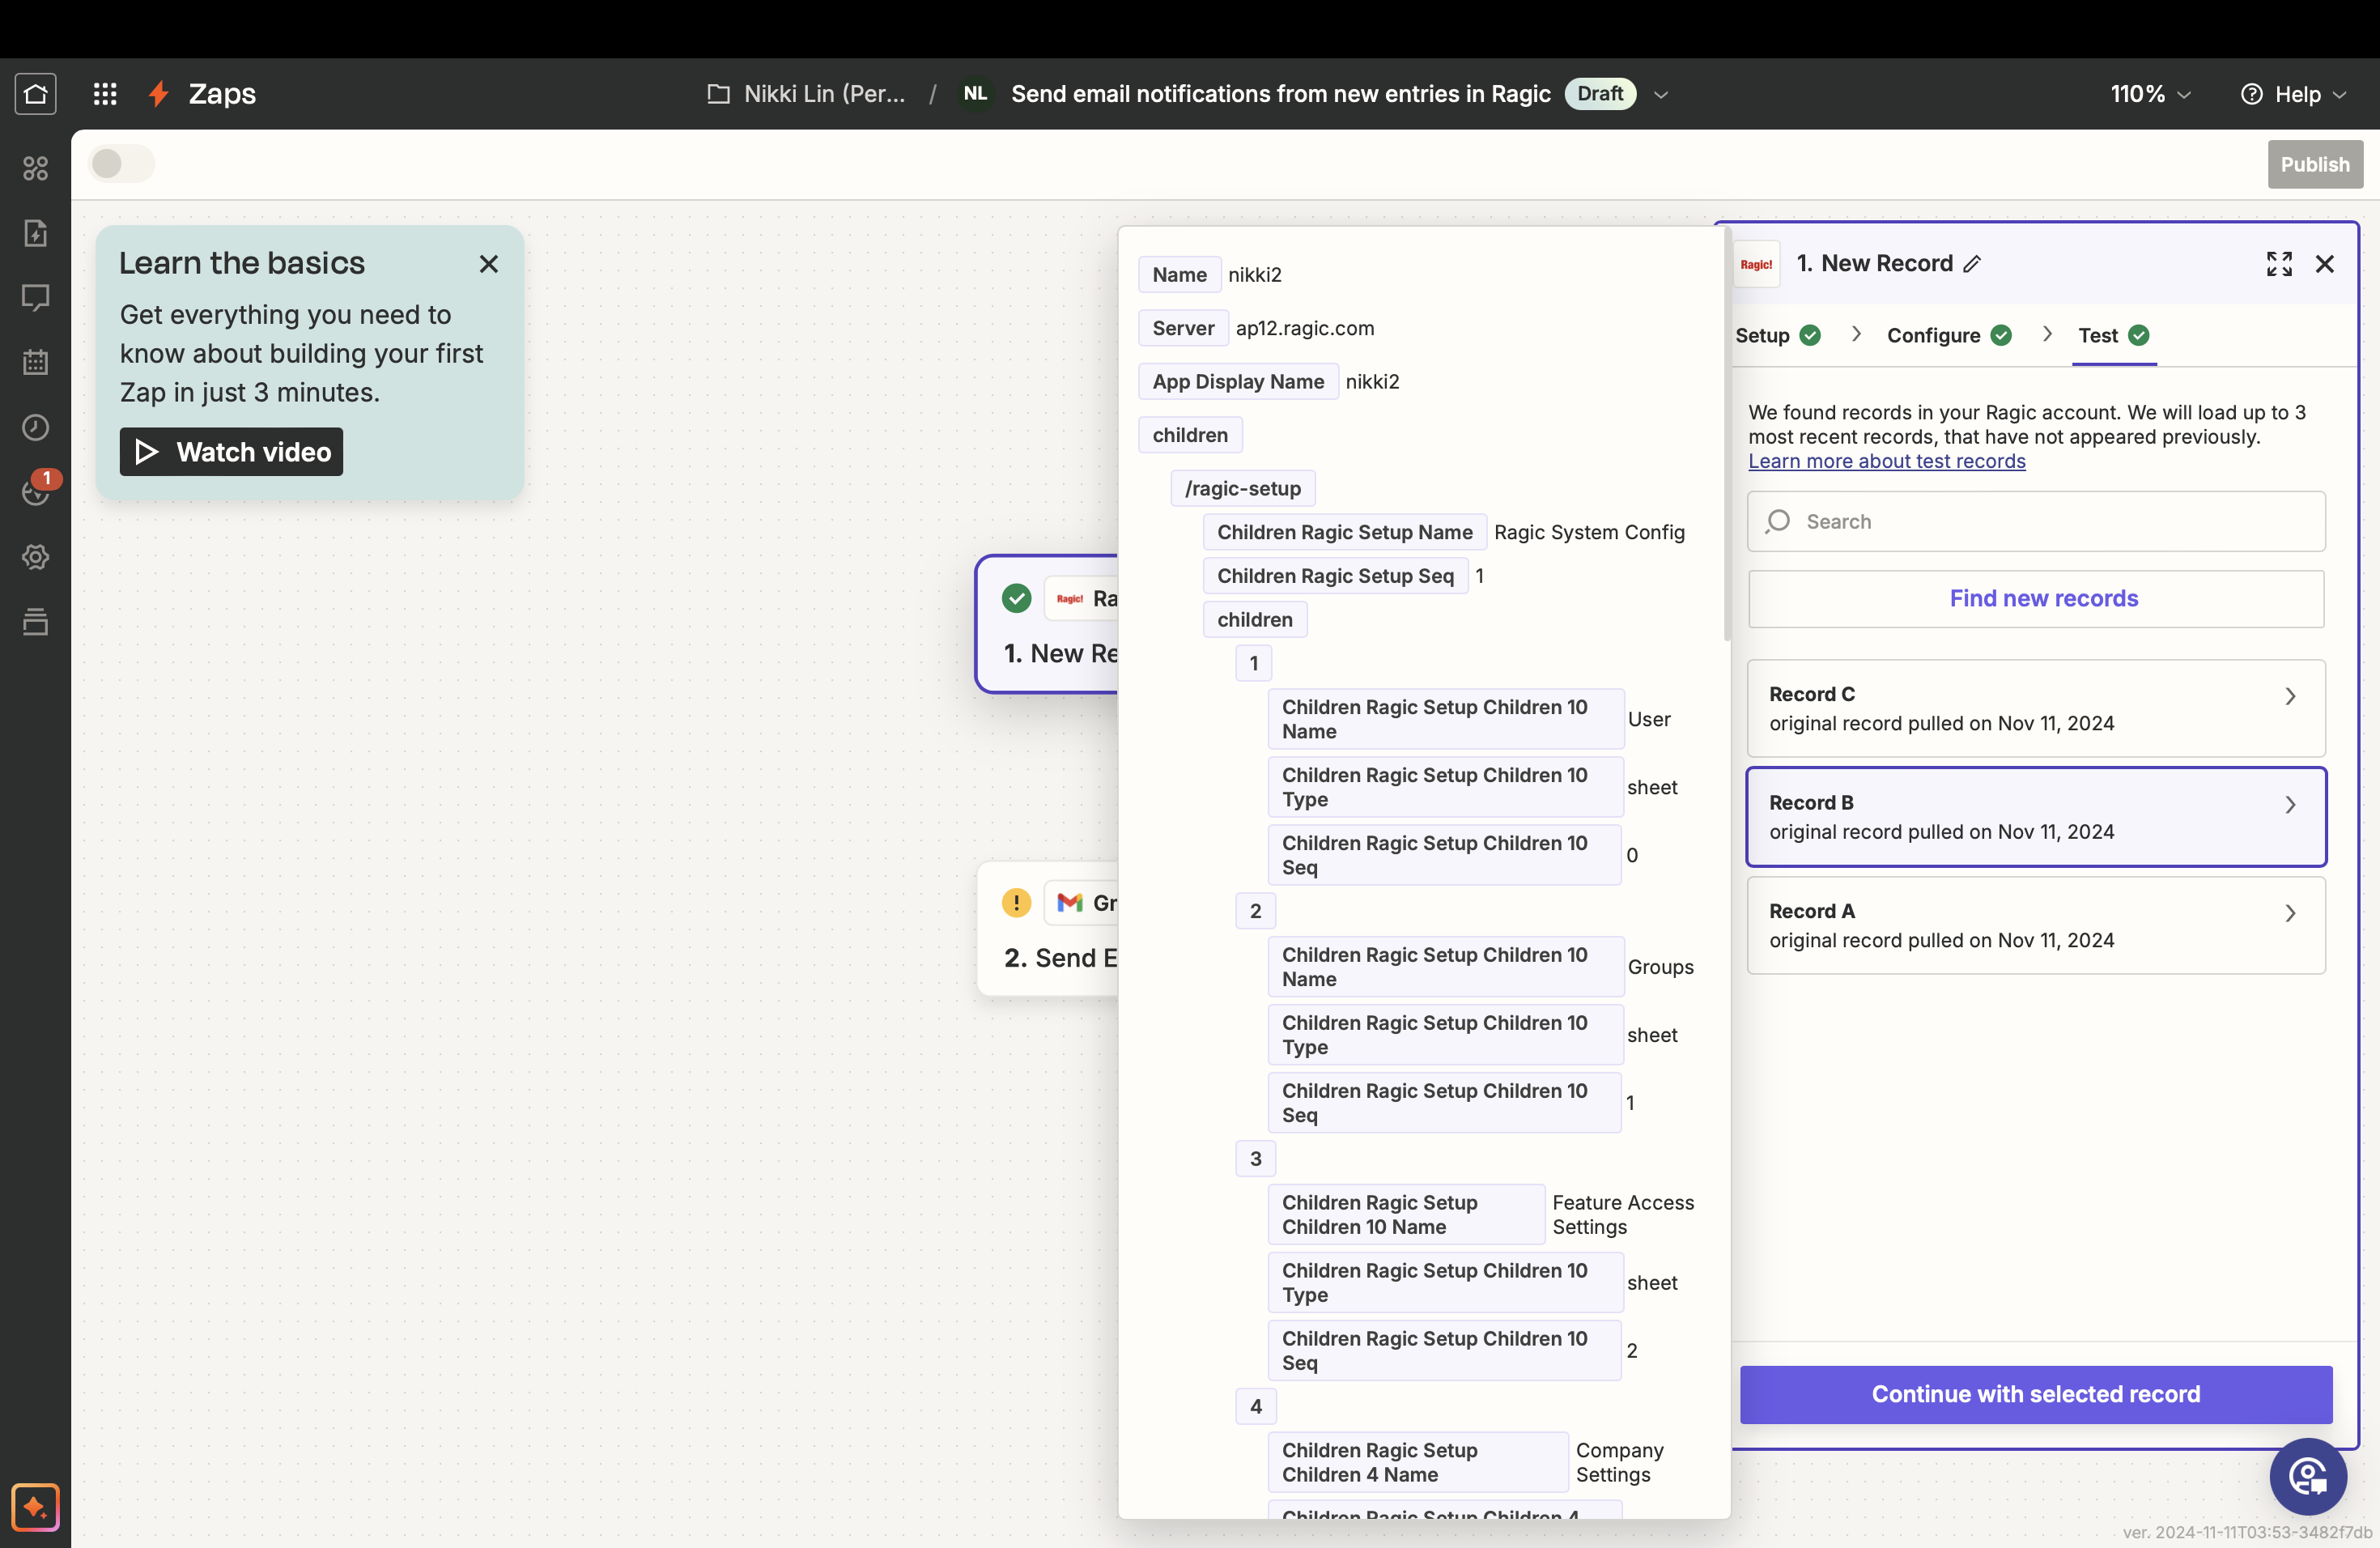
Zapier will help test whether the connection can be made. If successful, Zapier will show 3 of your most recent records, and you can select 1 for testing.
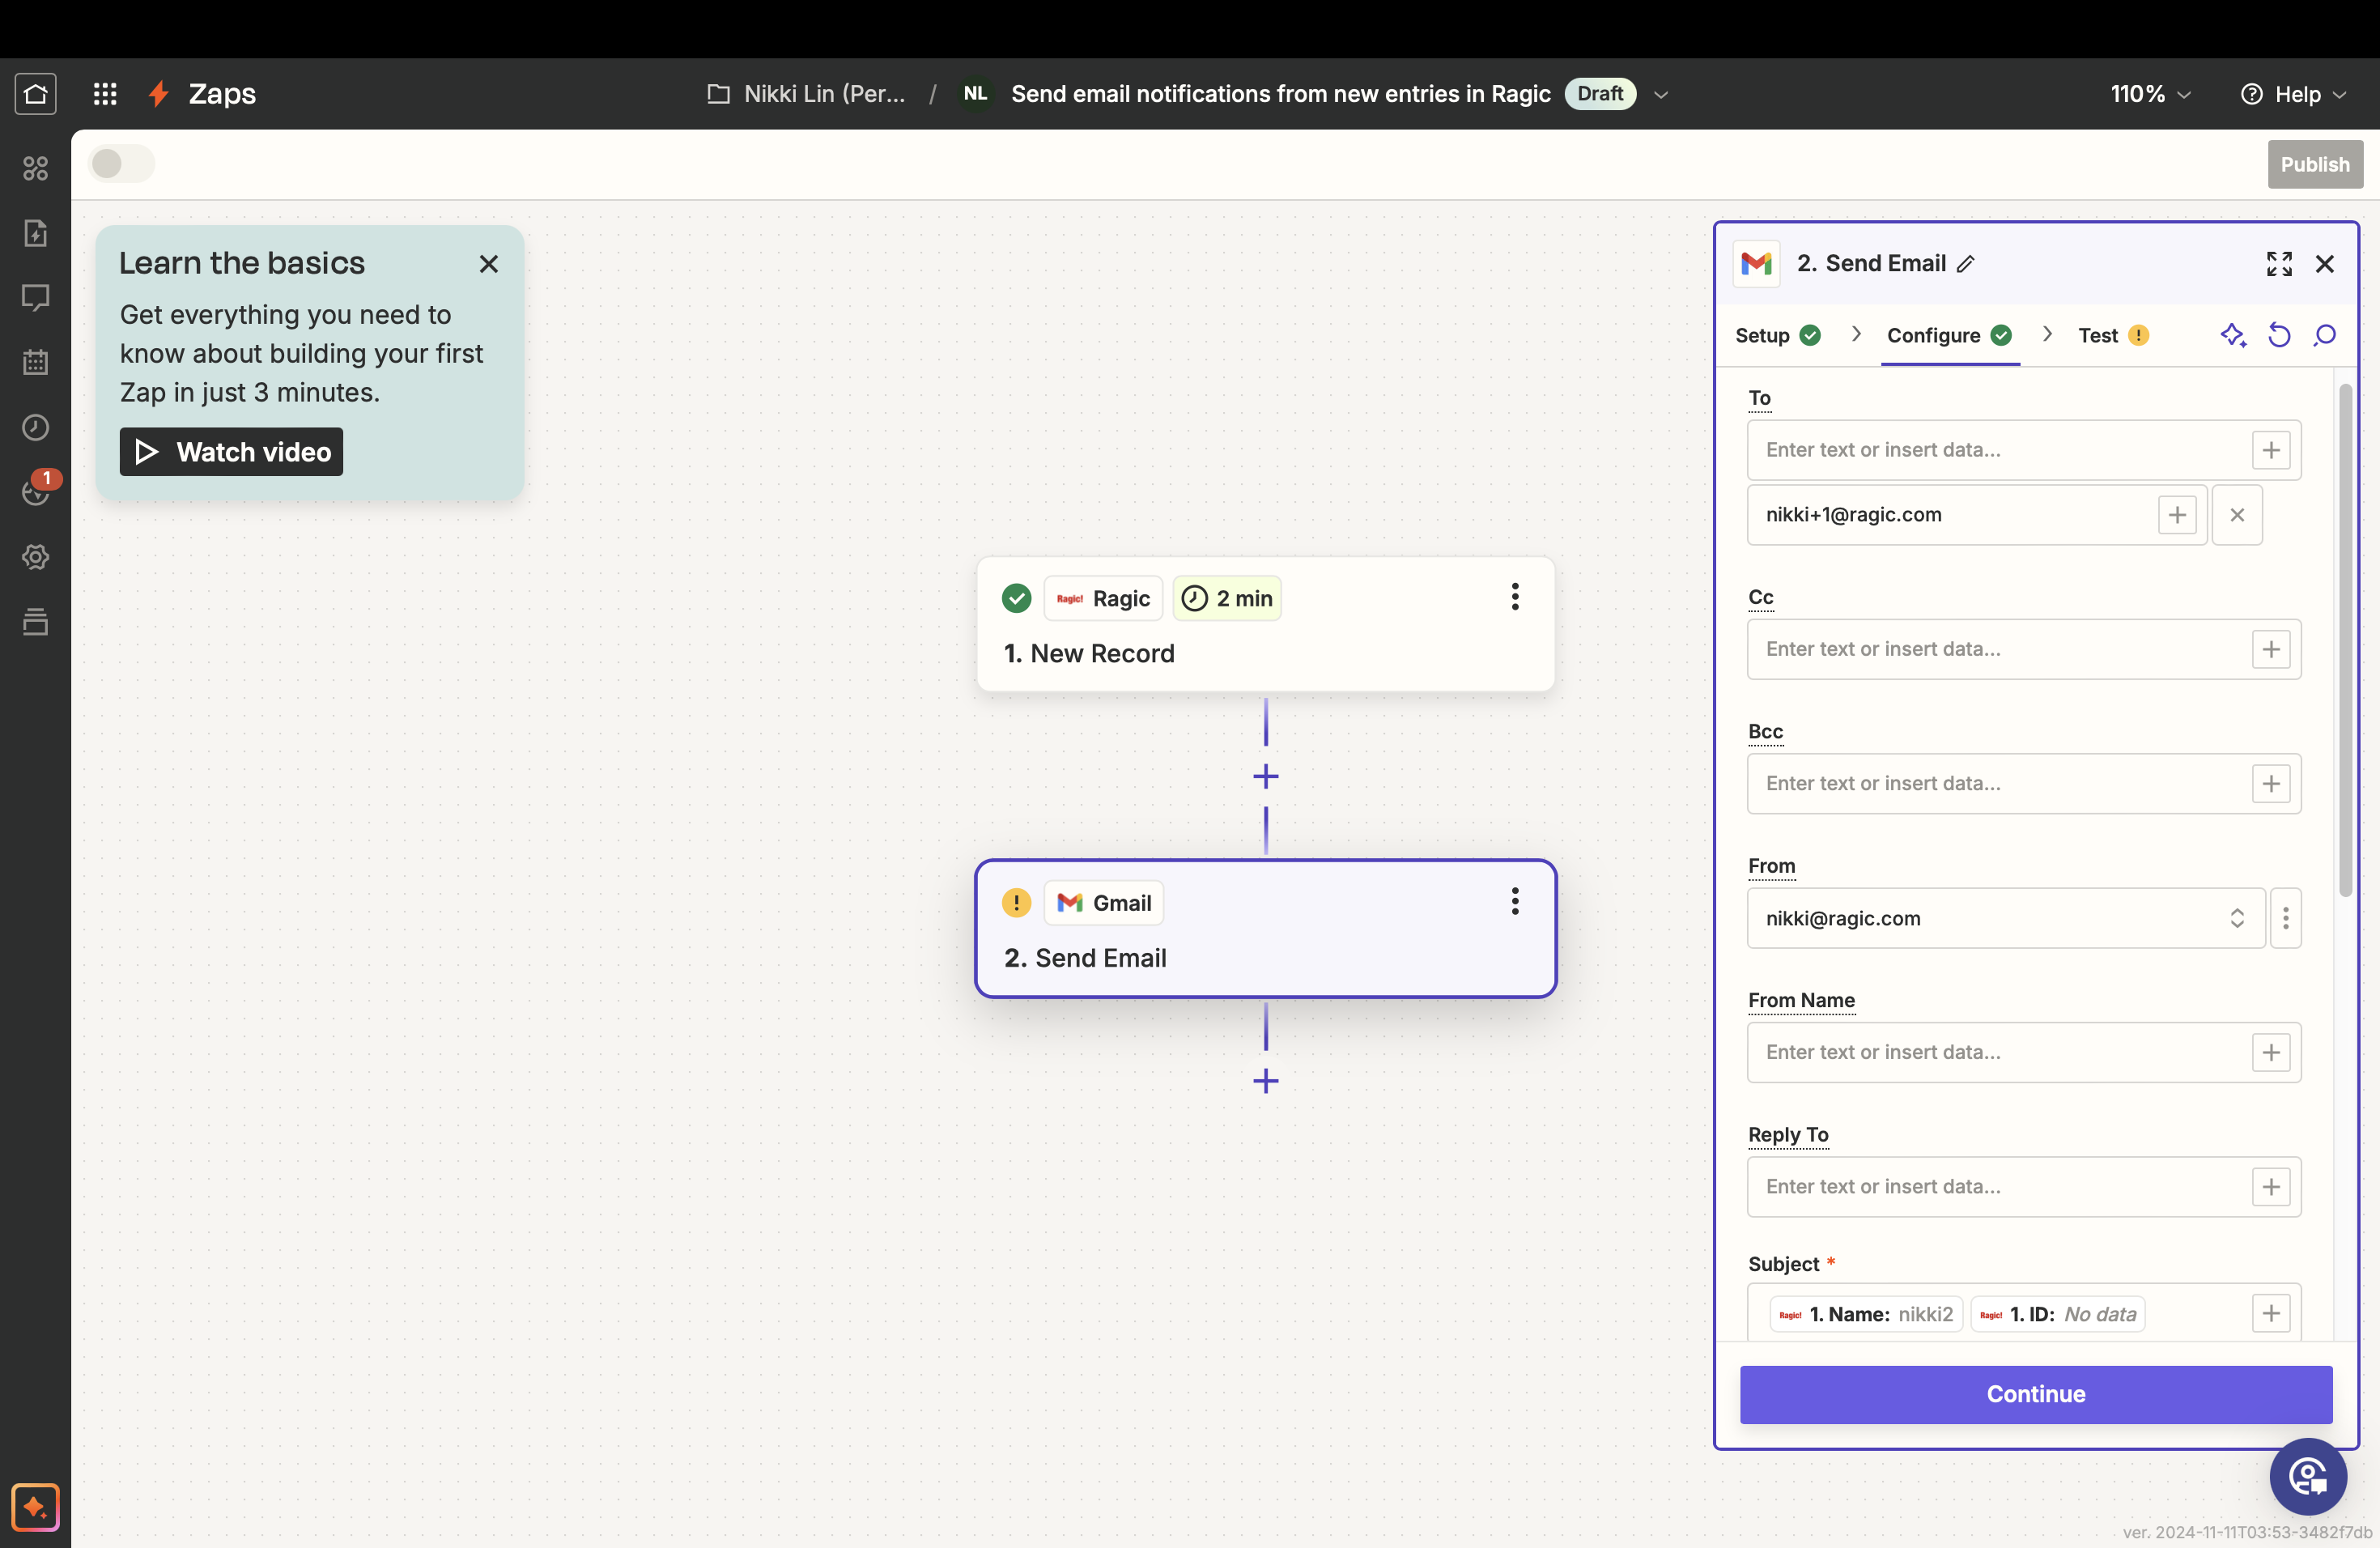
In this example, the action is “send email.” In this step, you’ll need to create the mail template and decide on what kind of information you would like to populate into the email and map the necessary fields with Ragic data.
Zapier will then use the selected data for testing. Once completed, select “Publish” to complete the process. Zapier will ask you to name your Zap, which will automate actions according to your configured settings.
If you can’t find the application you wish to integrate in the listed templates, you can also create your own Zap.
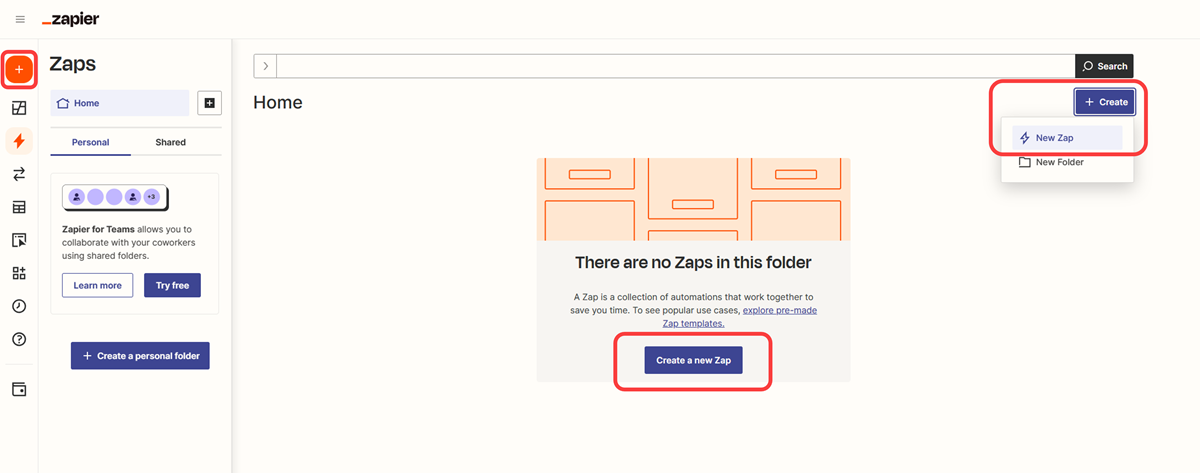
Log into your Zapier account (or create an account if you don't have one yet.) In this illustration, we’ll create a Zap to: “Simultaneously add new rows to Google Sheets whenever new data is added in Ragic.”
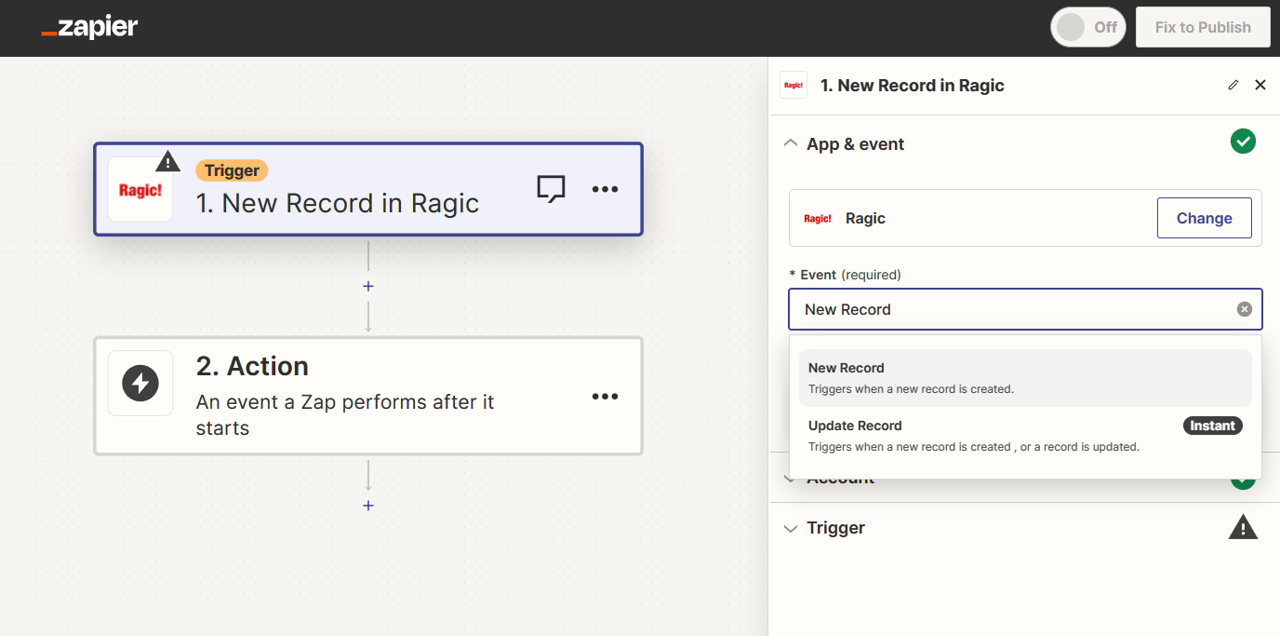
Since our trigger point is when a new piece of data is added to Ragic, select Ragic as the app and “new record” as the event.
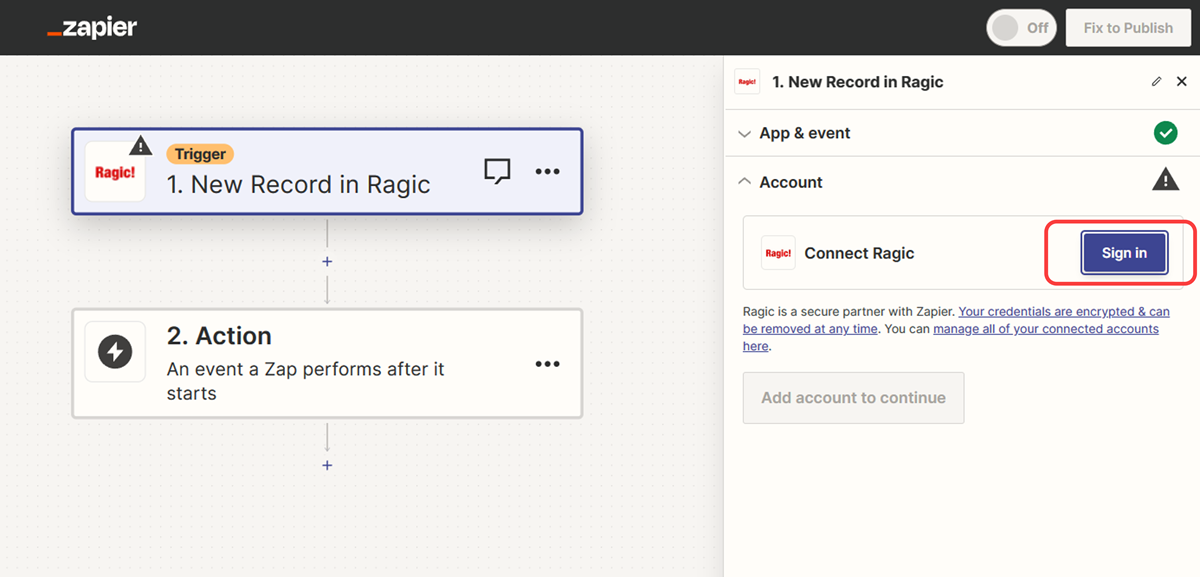
Click Sign in and Zapier will ask you to connect your Ragic account to Zapier through the API Key. (If you have previously connected Ragic and Zapier, you can skip directly to Step 4.)
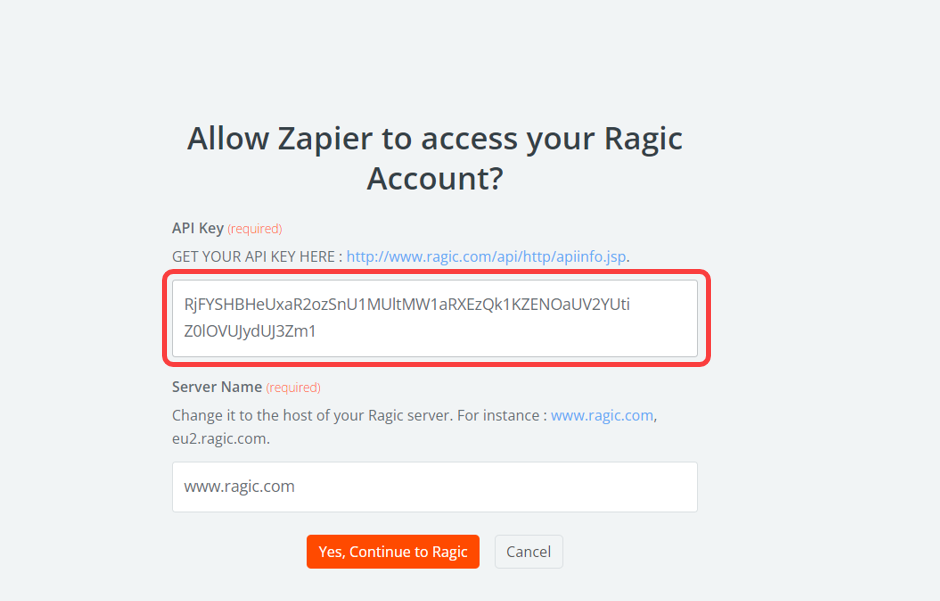
You’ll be prompted to enter the API Key and Server Name in this window.
Server Name: You can refer to your Ragic URL. For example, if your Ragic URL is “https://www.ragic.com/test” , you must fill the Server Name as “www.ragic.com”
API Key: You can check it under Personal Settings.

Paste your API Key into Zapier.
After selecting the sheet and completing set up, Zapier will help test whether a successful connection can be made. You can proceed to the next step if the connection is successful.
Since the action is to “Simultaneously add new rows to Google Sheets,” choose Google Sheets as the app and “Create Spreadsheet Row” as the event. You must also connect your Google account with Zapier and select which spreadsheet and row Zapier should update with the corresponding fields.
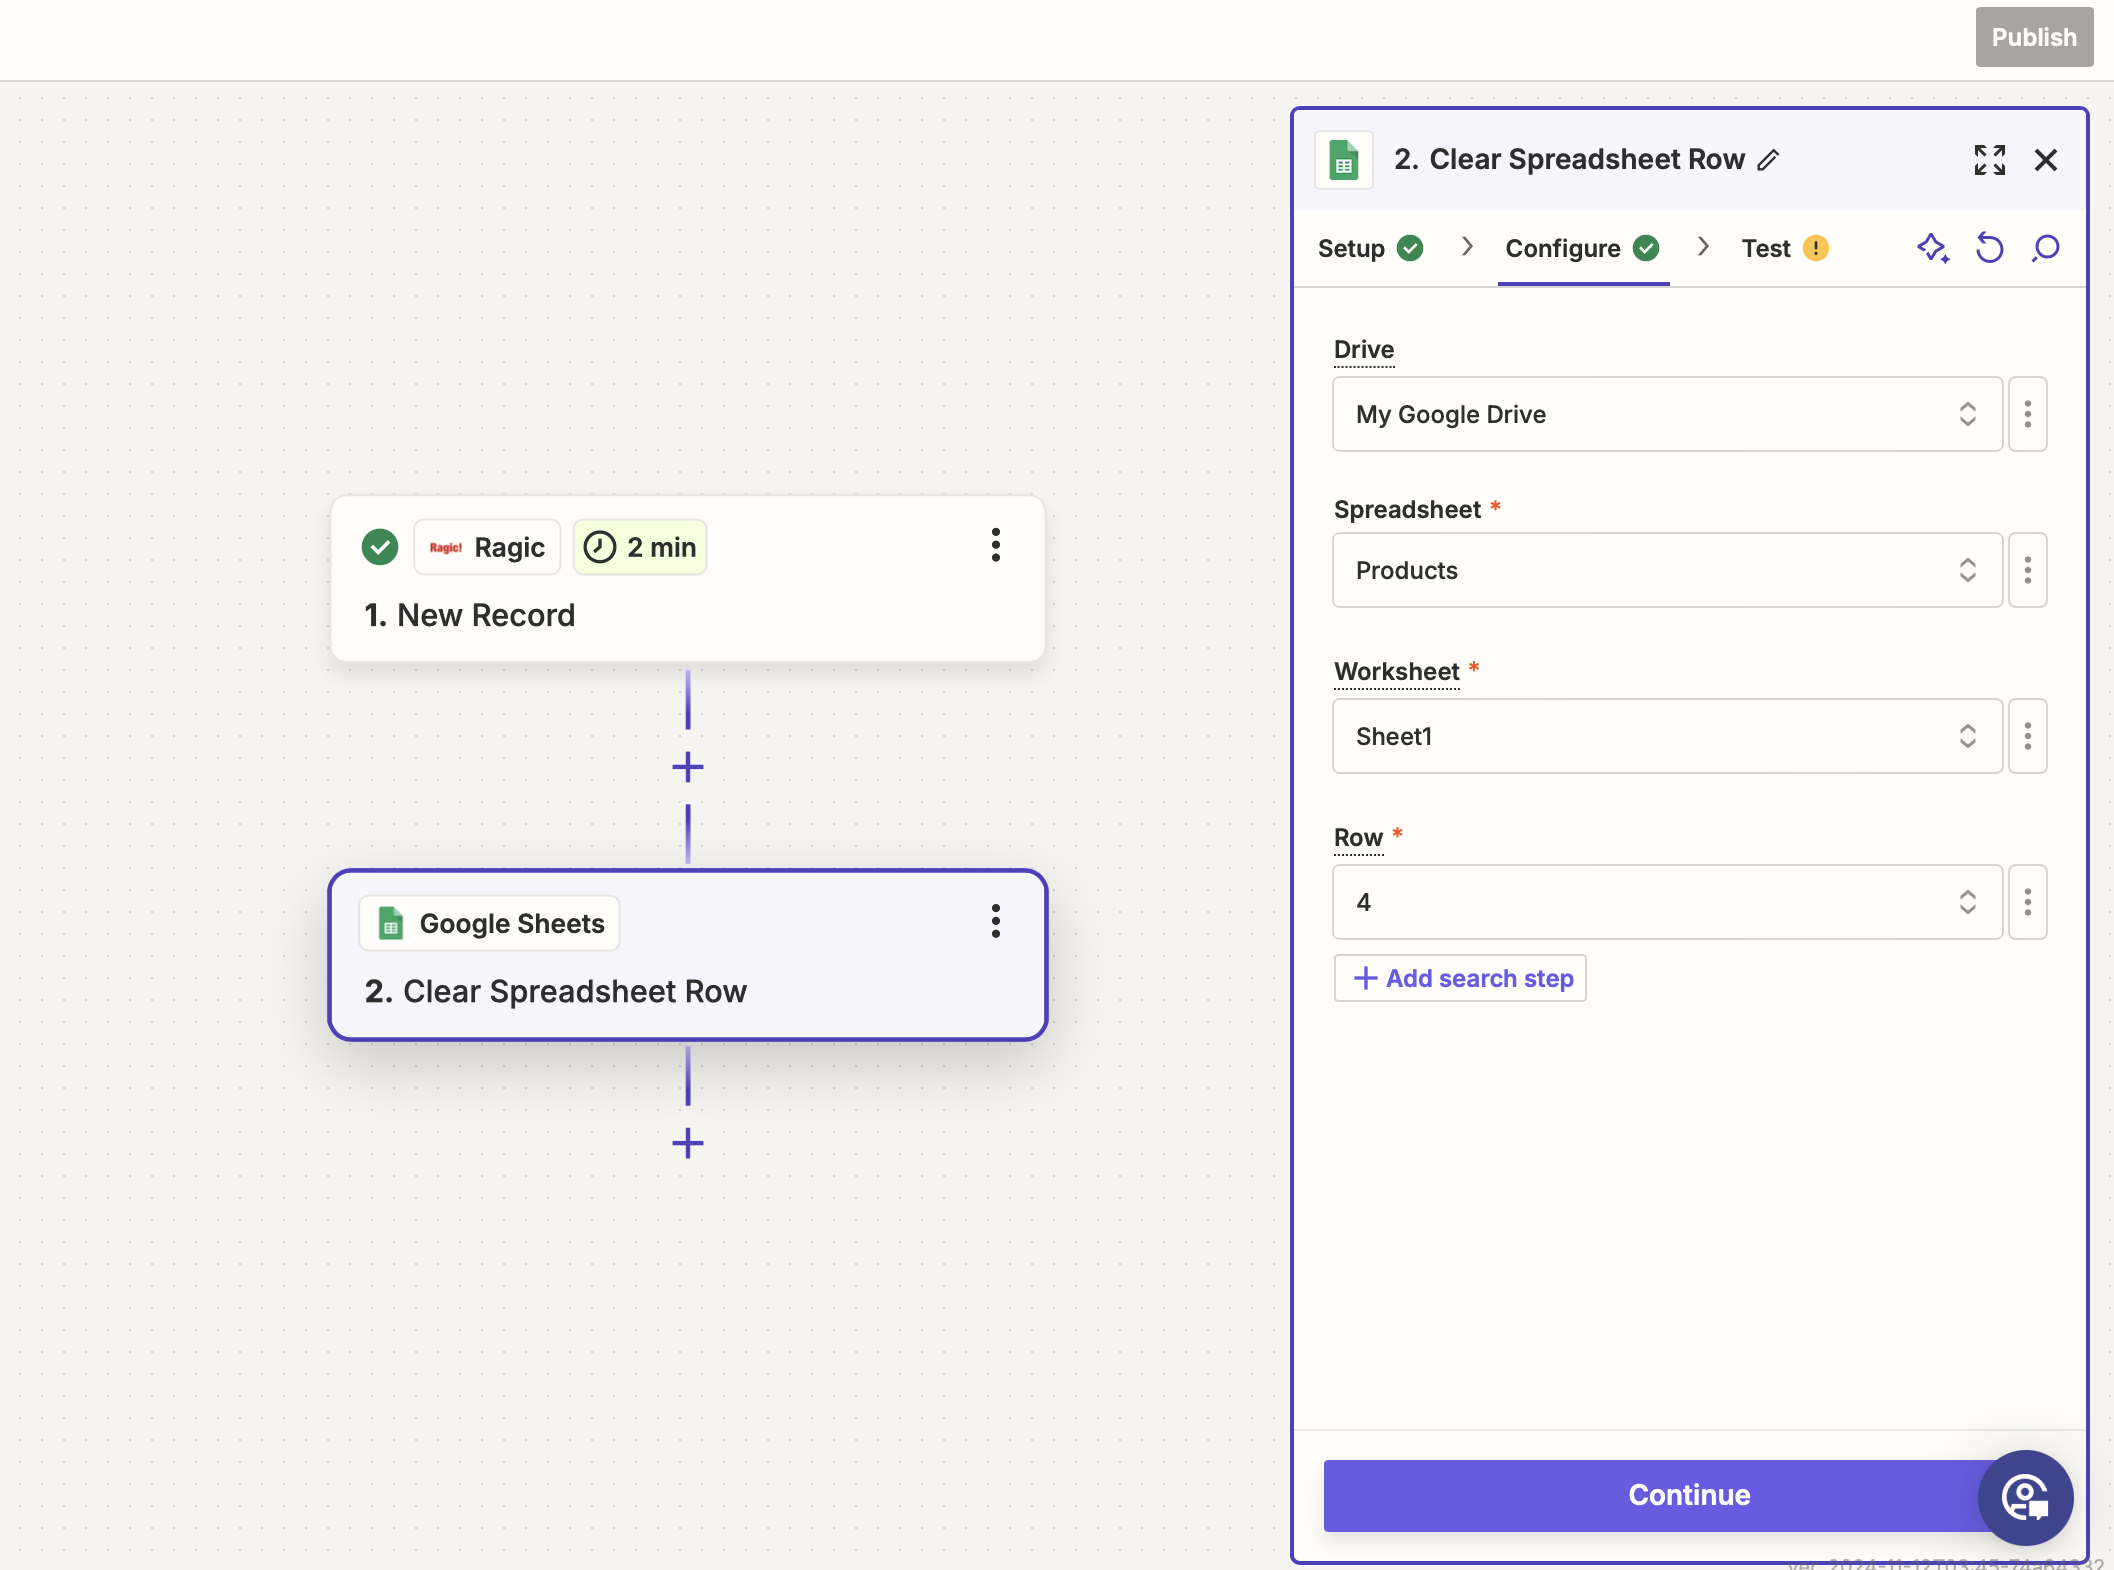
Zapier will use a piece of data in your Ragic sheet to conduct the test. After the test is completed, click Publish to complete the setting process.
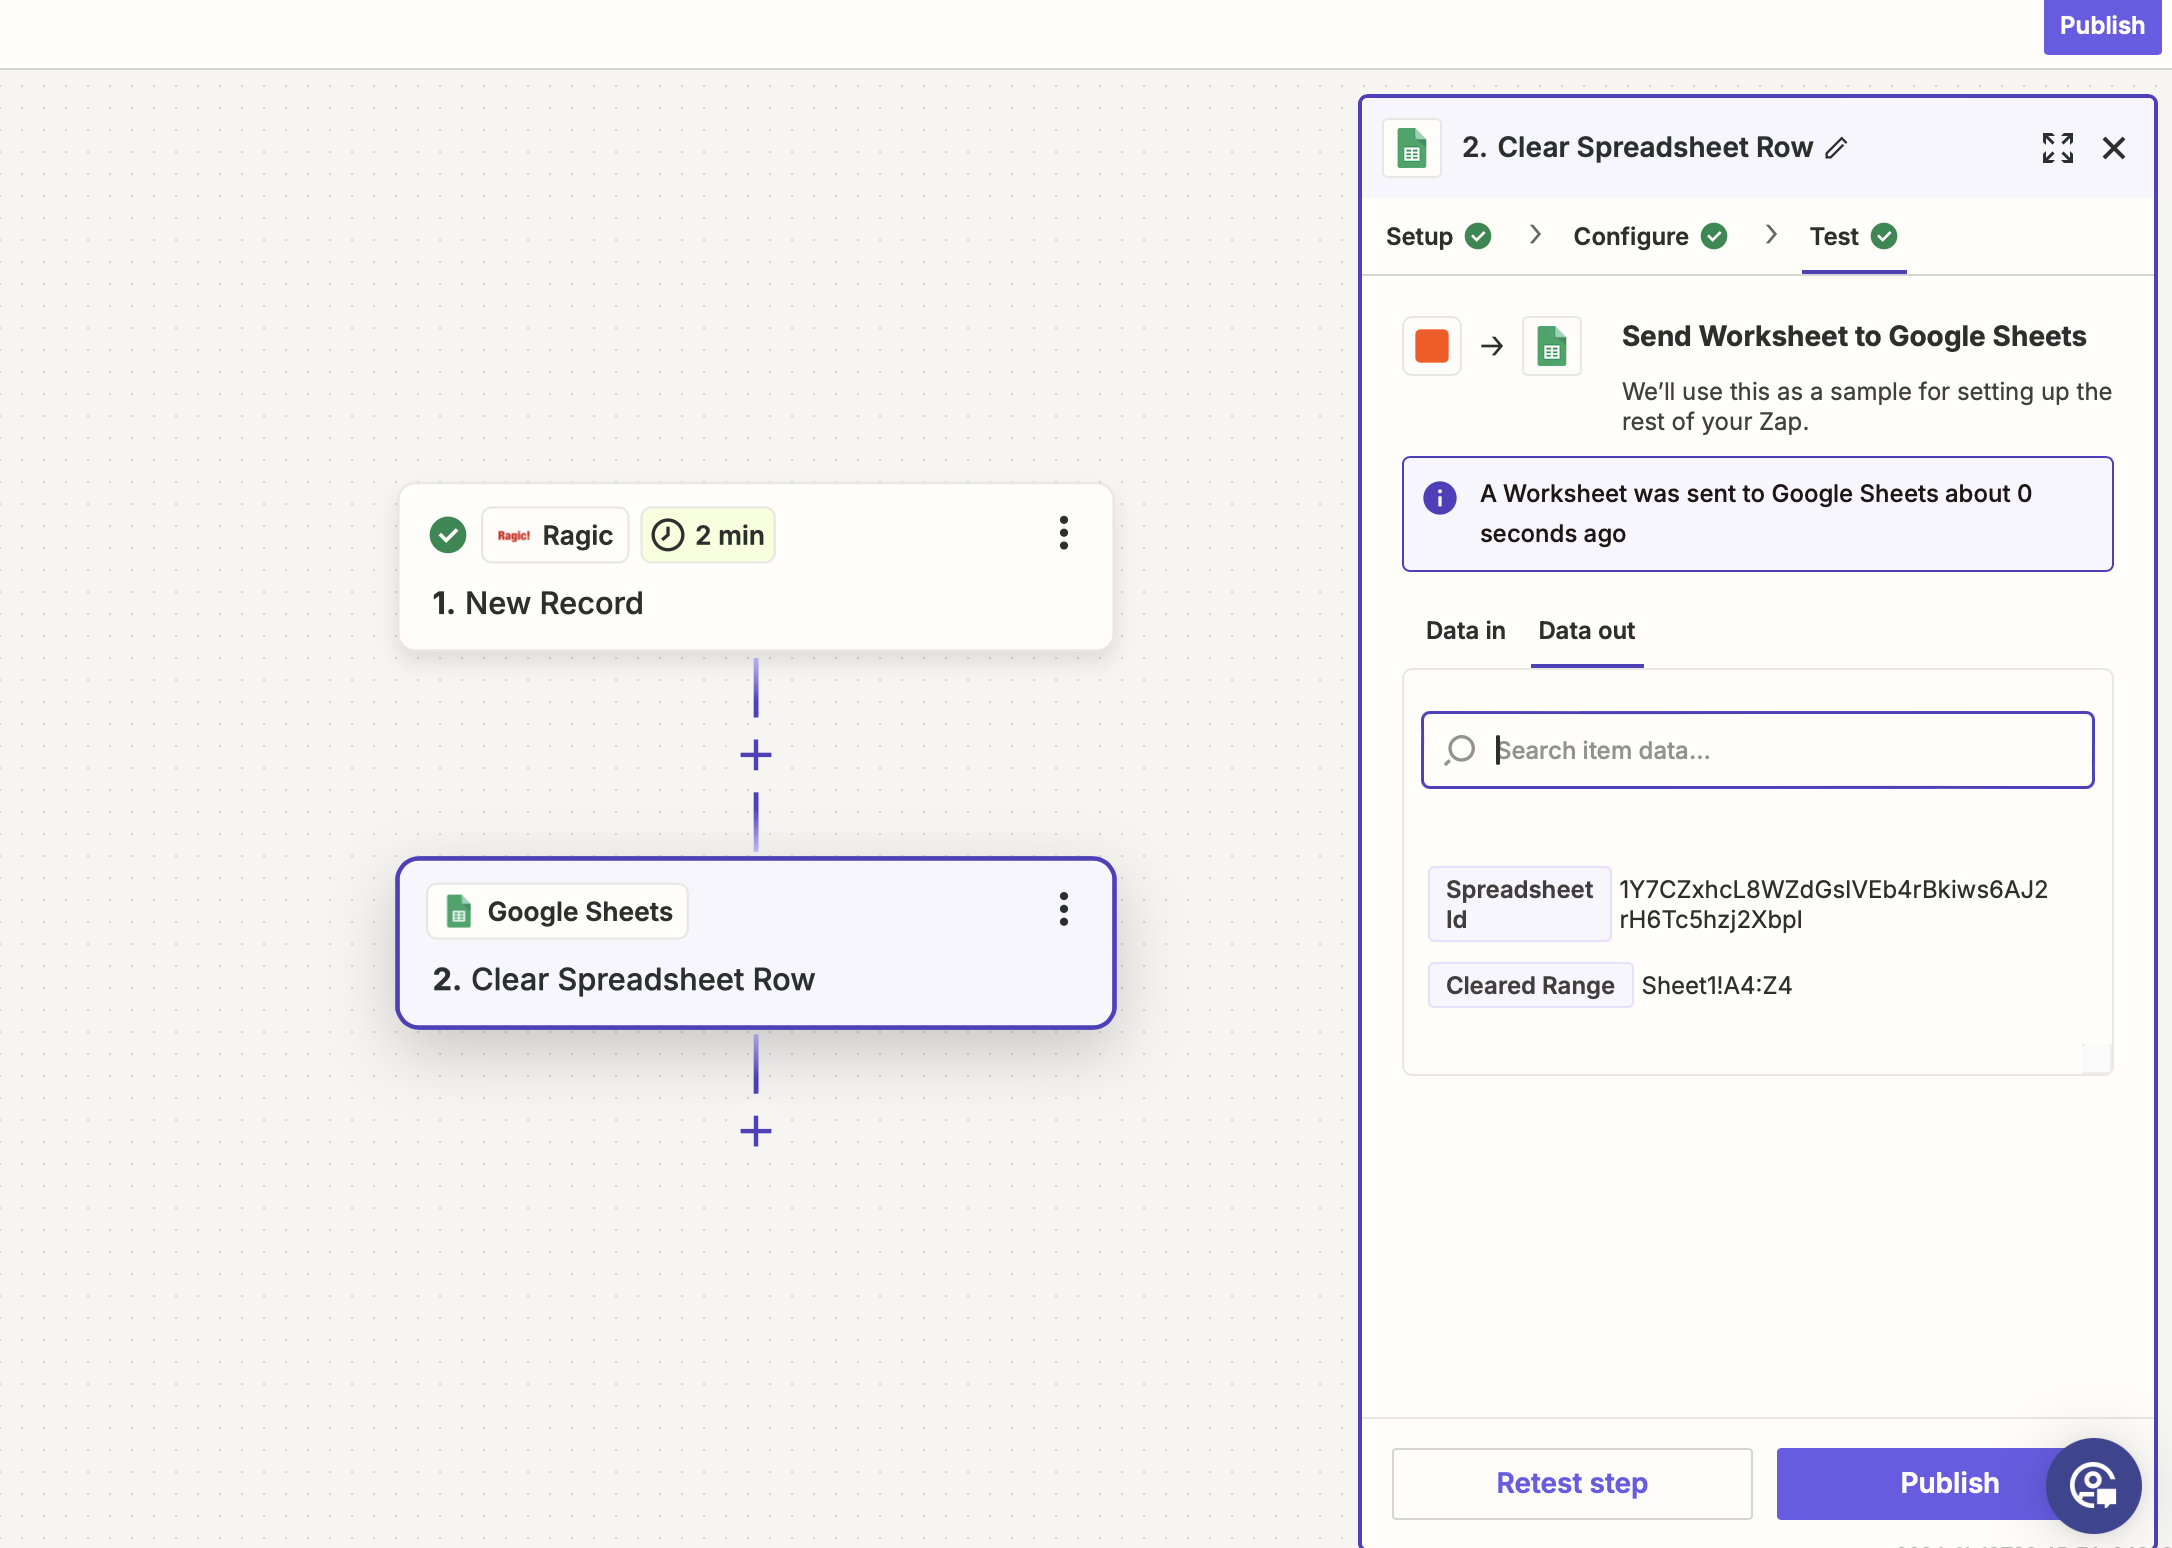
Once completed, enter Google Sheet and view the synchronized data by Zapier.
Zapier provides a variety of online automation services. In addition to Google Sheets, you can also integrate Ragic with other cloud services.
Reminder: With Zapier free plan, the frequency of syncing is 15 minutes and limited to 100 entries per month. Therefore, if you create more than 100 entries in a month, those entries would be unable to sync via Zapier successfully. You can go to Zapier Official Website for more details.
 Thank you for your valuable feedback!