You can adjust the appearance of your sheet in the Design Mode and design specific versions for printing purposes.
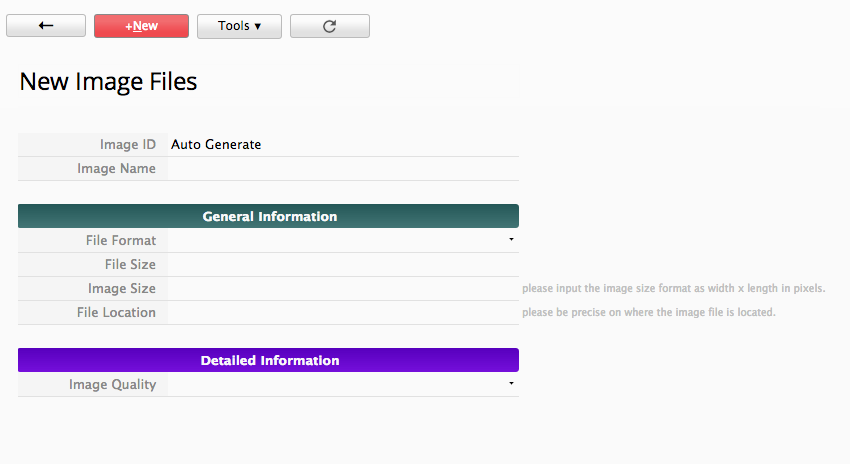
Adjusting the height and width of cells works the same way as in Excel. You can drag the right border of a column to adjust its width and the bottom border of a row to adjust its height.
You can adjust the width of a column by dragging its right border and the height of all rows by dragging the bottom border of one row.
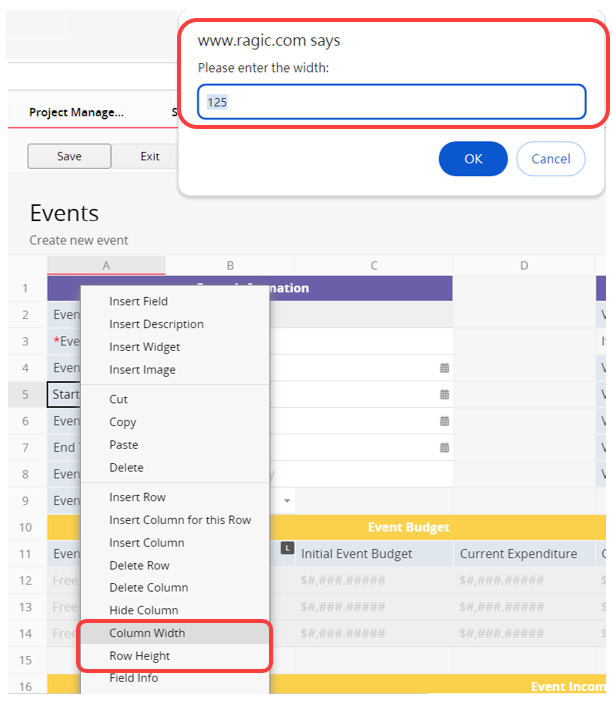
You can right-click the column or row you want to edit and select the Column Width or Row Height option. Then, directly enter "pixel values" to adjust the column width or row height in the pop-up window.
Additionally, you can drag multiple fields and adjust their widths or heights simultaneously.
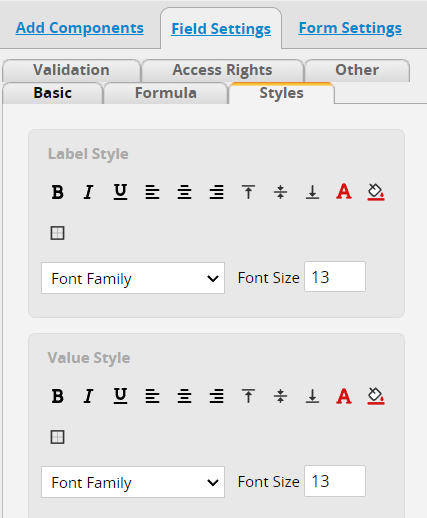
You can modify the style of field headers or values from the Styles tab on the left sidebar in the Design Mode, including color, font size and style, and text alignment.
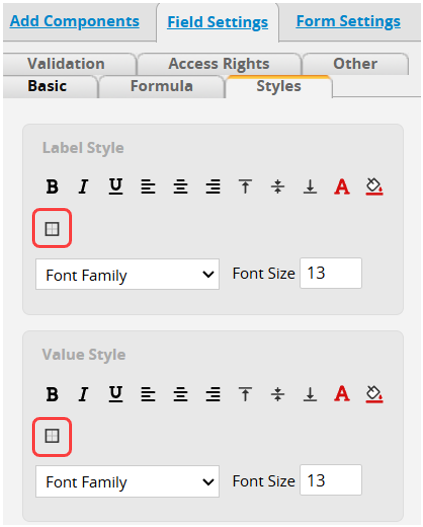
Additionally, you can design field borders.
Select the border color and style.
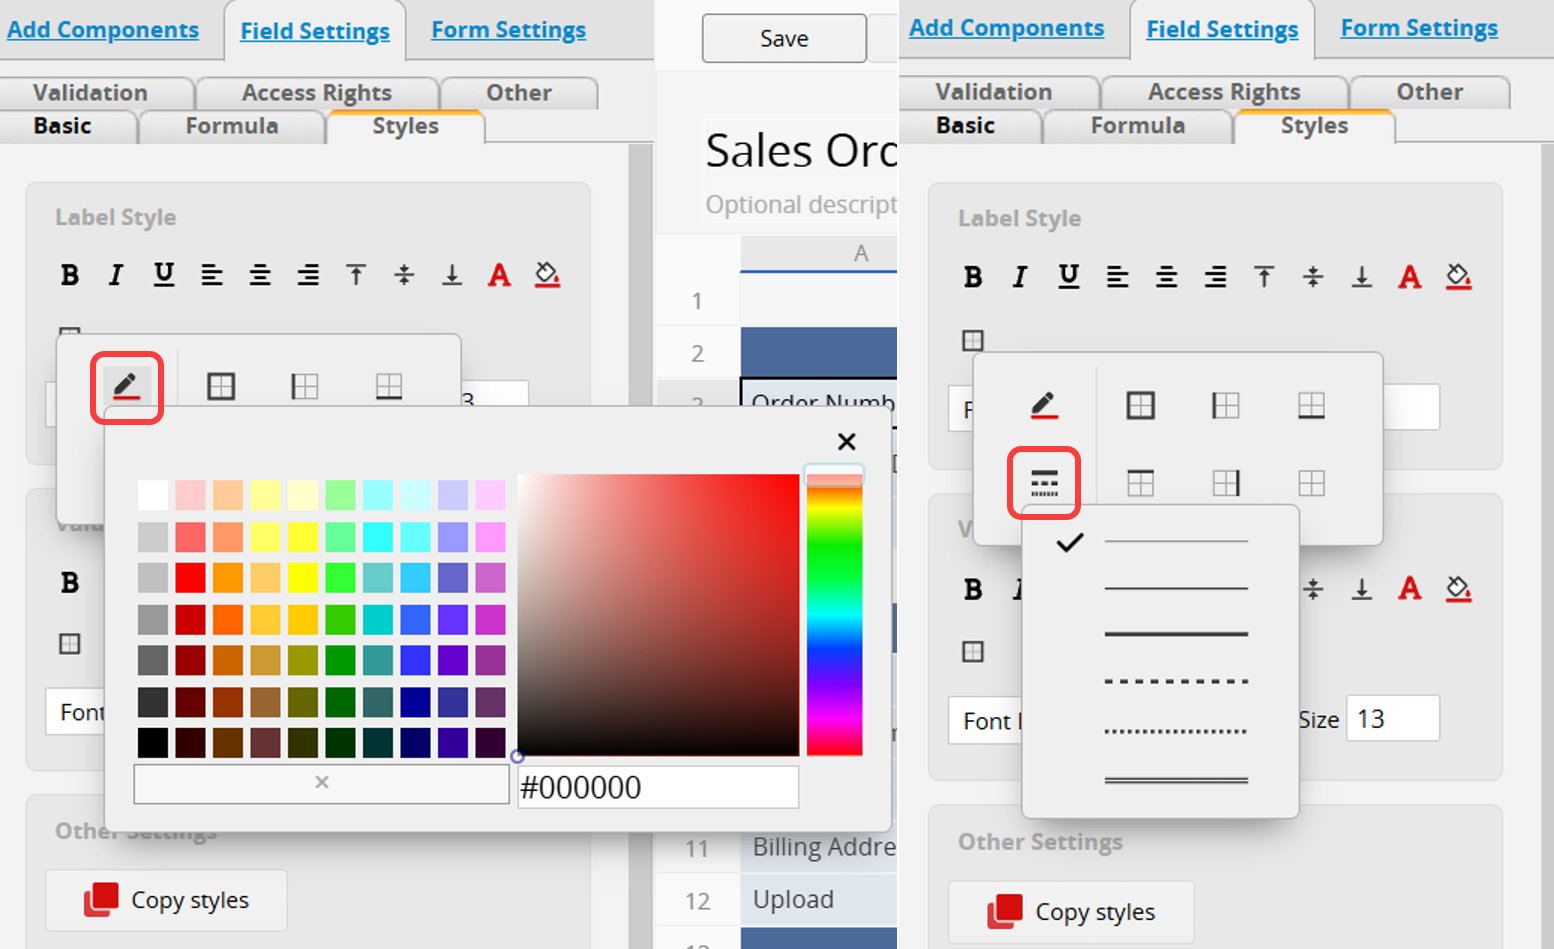
Choose the border position. To apply borders to specific sides (e.g., left and bottom), simply select each side once!
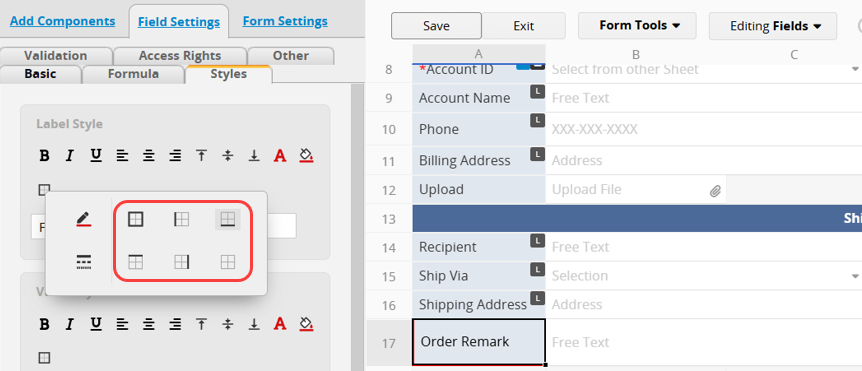
This can be done separately for Form and Listing Pages.
If you want to apply custom styling to field values while entering data, you can use BBCodes for text formatting.
You can also add Borders to field headers and values from the Styles tab in the left sidebar. This can be done separately for Form and Listing Pages.
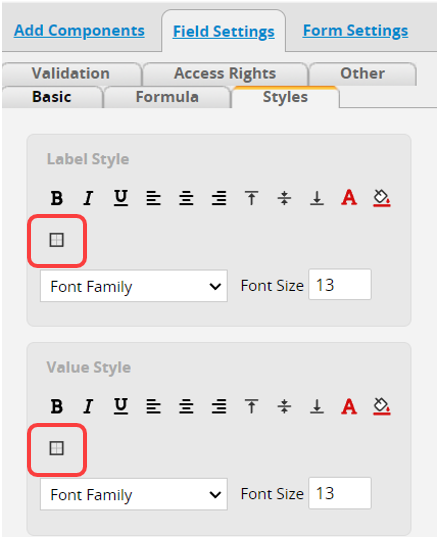
Click on the Border Icon under the Label Style or the Value Style formatting toolbar.
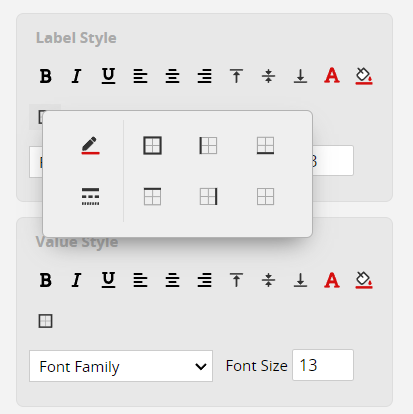
A formatting menu will display options for choosing the borders and their color and style.
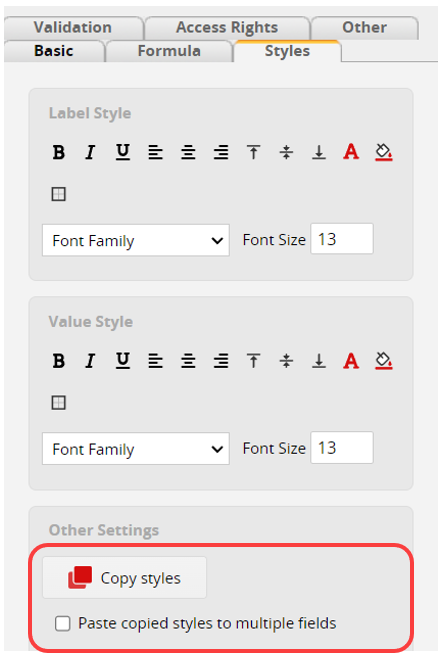
You can click the Copy Styles to apply the same style configurations to the next clicked field.
To apply a selected style to multiple fields, check Paste copied styles to multiple fields.
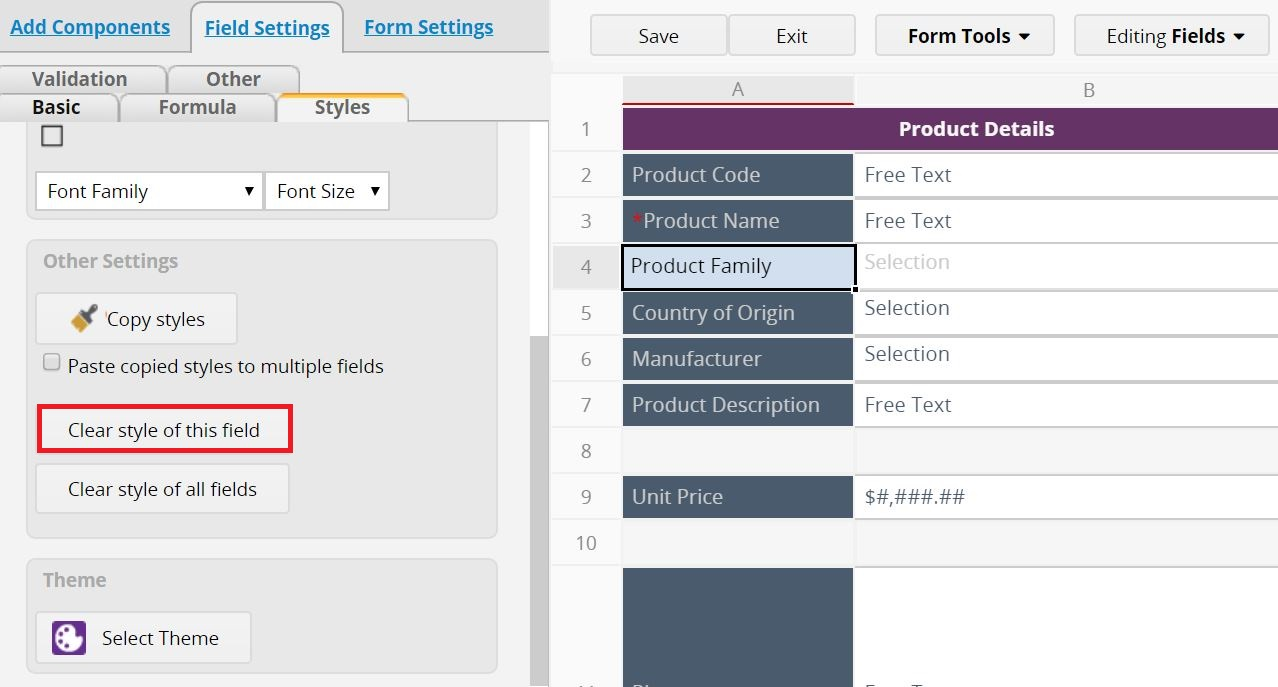
You can clear the style of a single field by clicking Clear style of this field under the Styles tab.
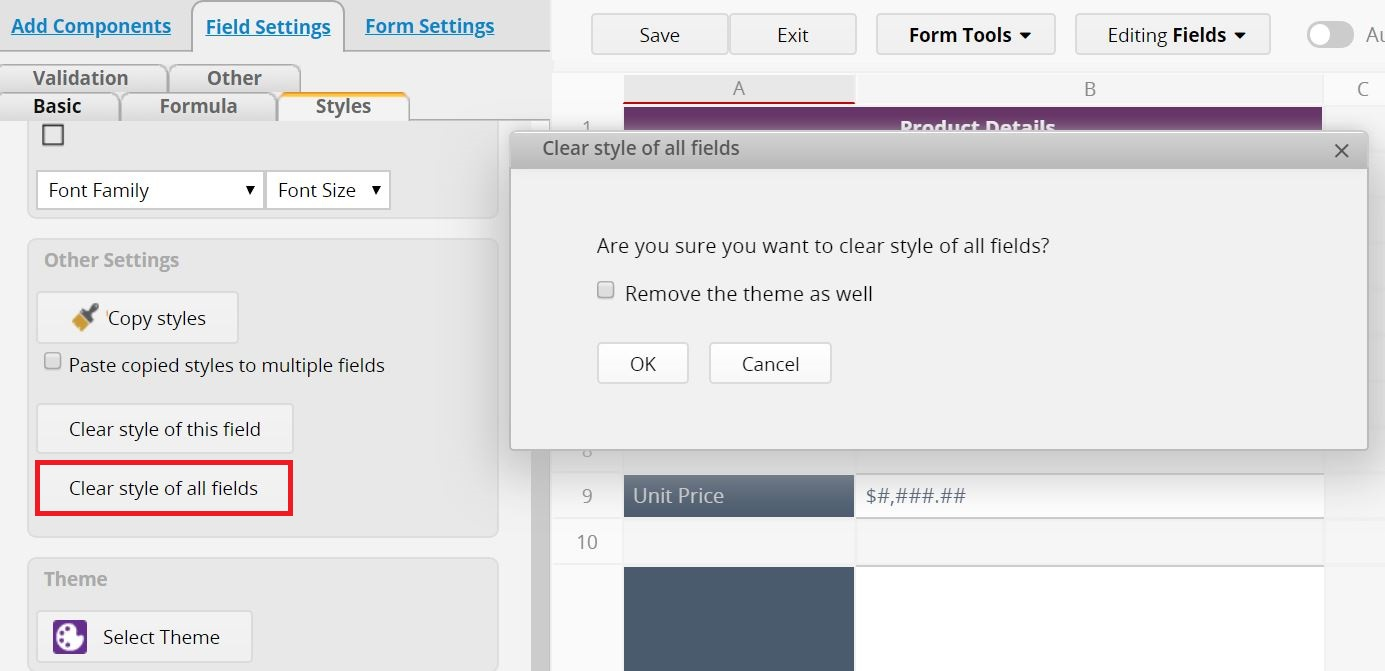
You can clear all the styles and Themes in this sheet by clicking Clear style of all fields.
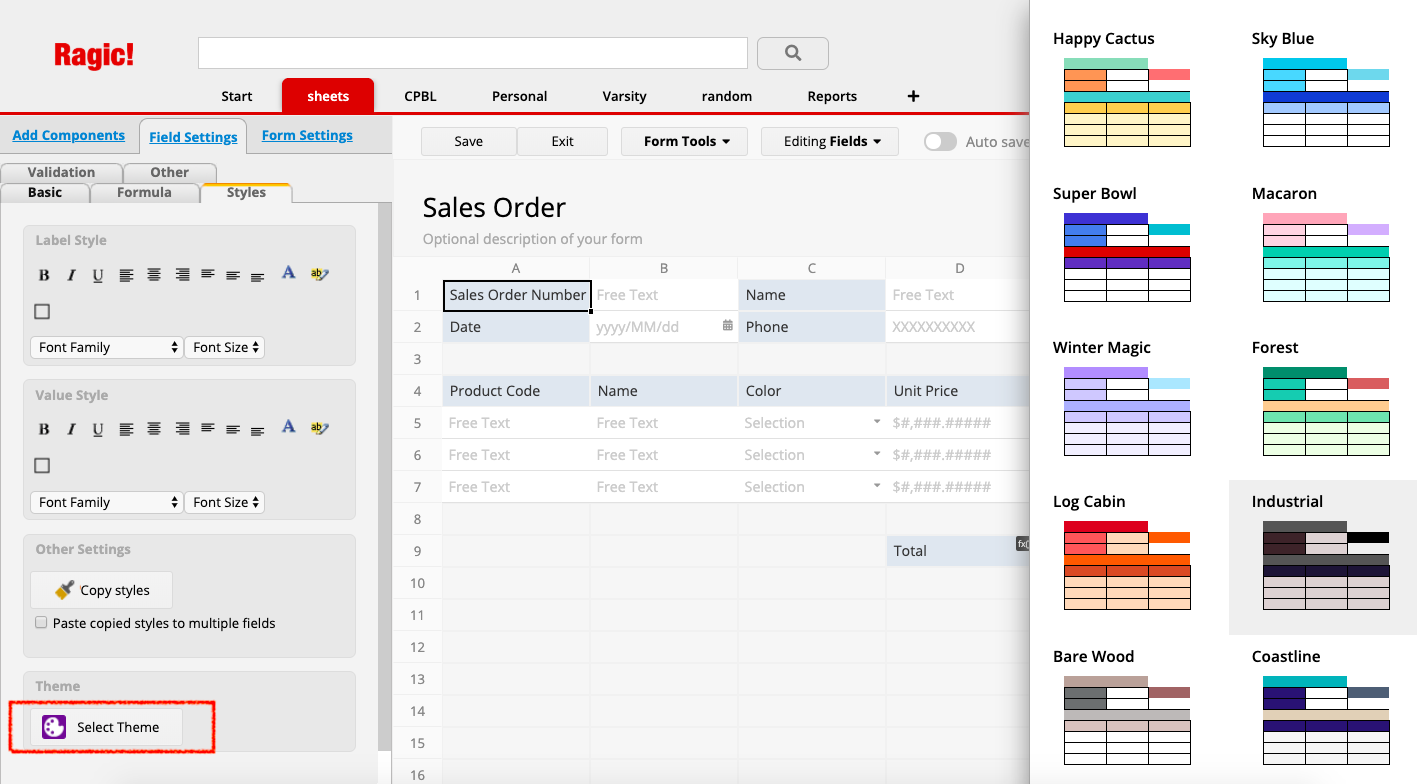
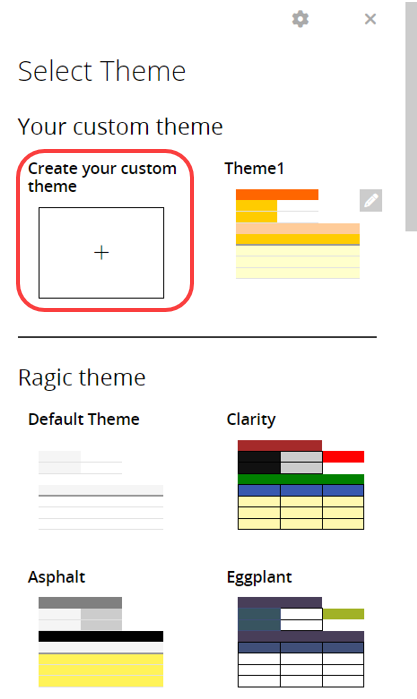
You can also apply the preselected theme to a Form Page or Listing Page. To preview available themes, click the Select Theme Icon under the Styles tab, then select and apply the theme of your choice.
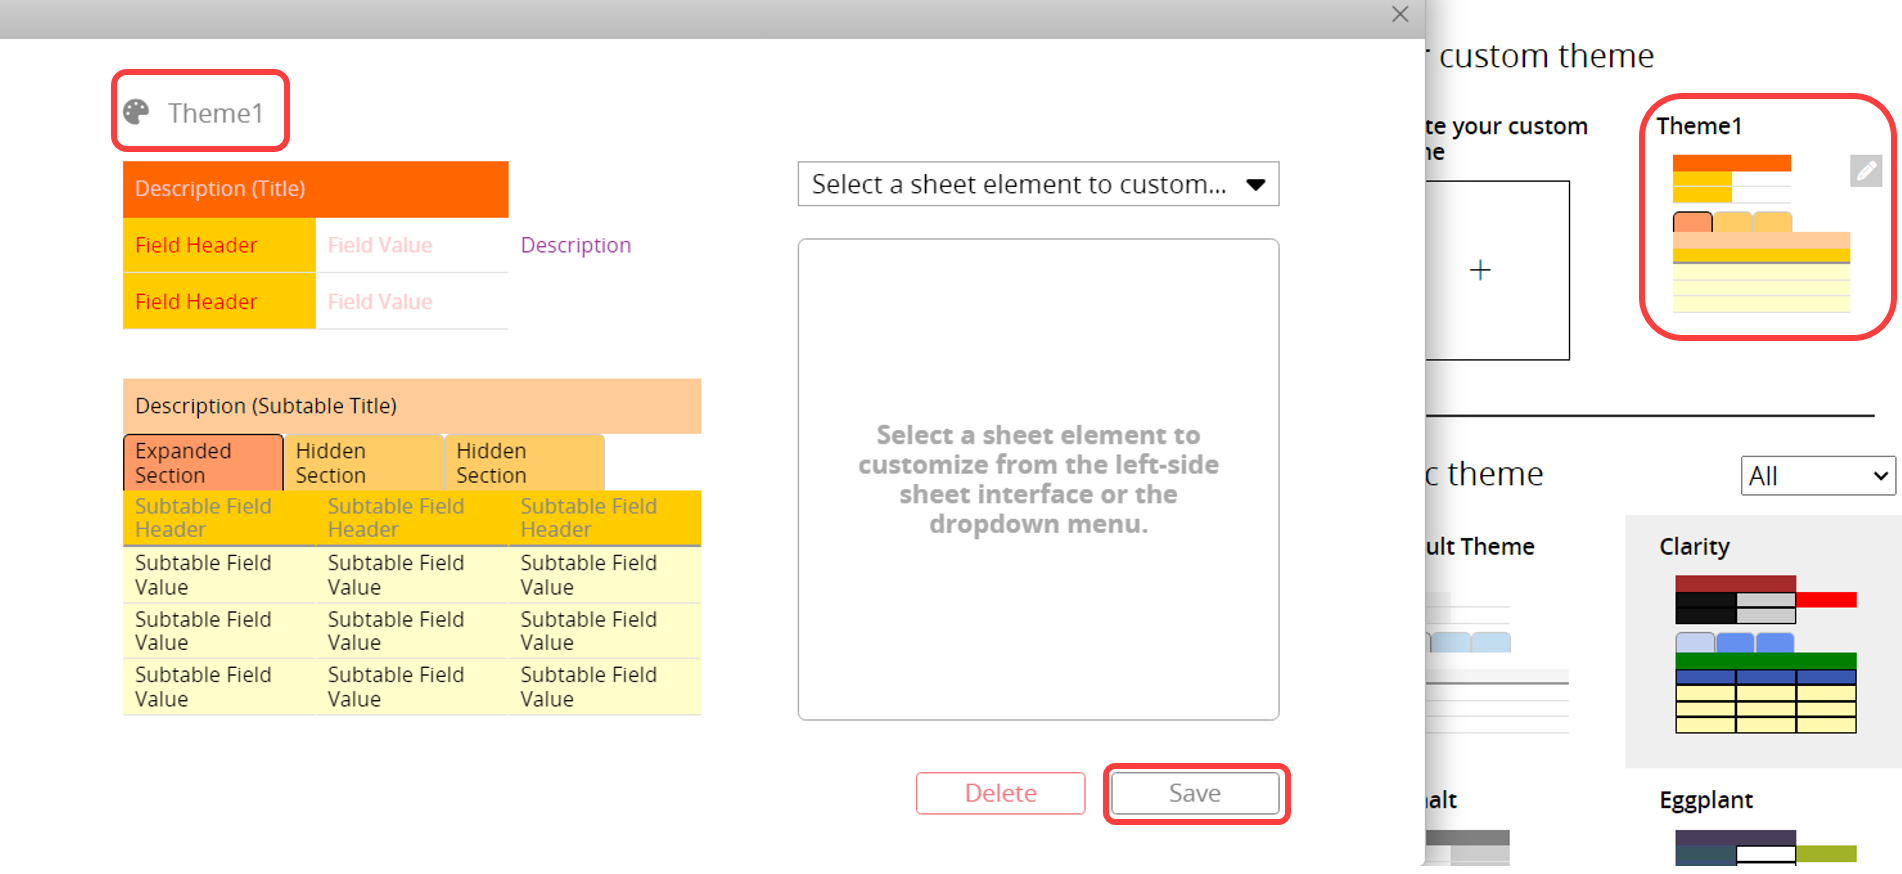
You can also create and save your custom themes. Click Create your custom theme under the Your custom theme section.
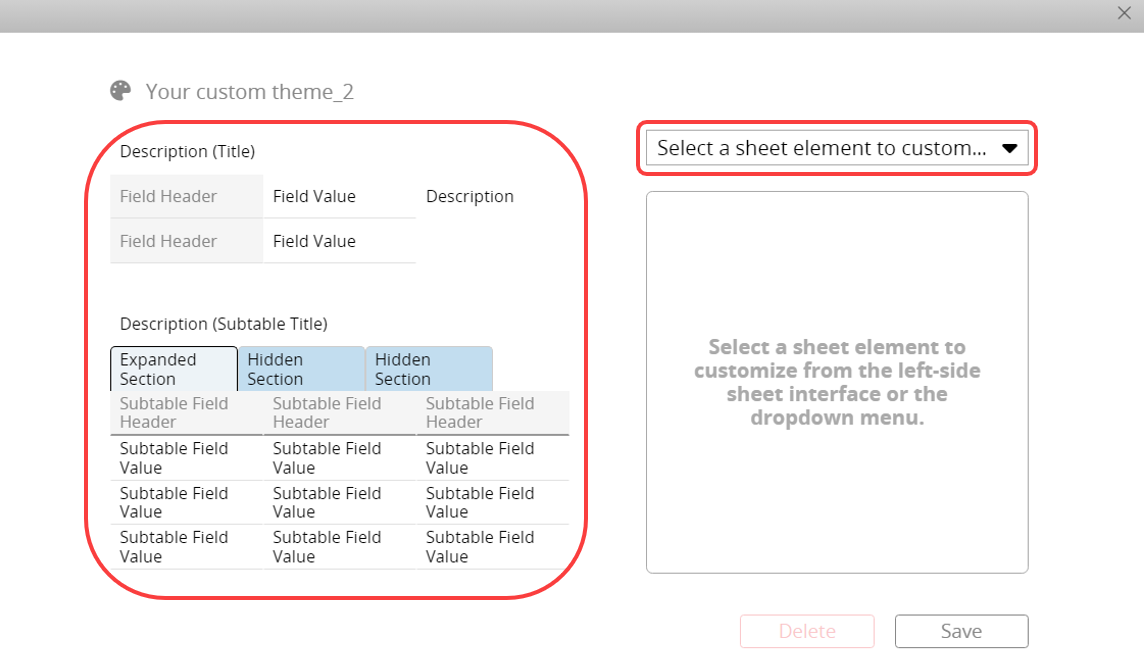
Select a sheet element to customize from the left-side sheet interface or the dropdown menu, such as "Description (Title) ", "Field Header", "Field Value", "Sheet Sections", and so on.
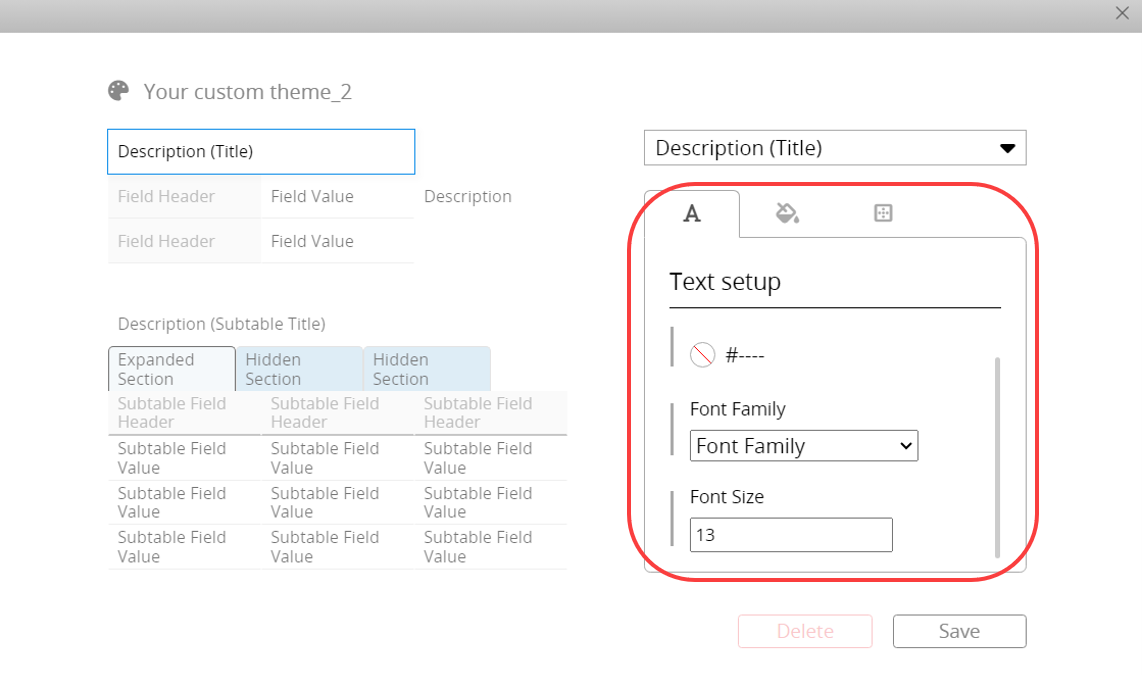
Set the color of the text, background, and borders for the selected element. You can also adjust the font and font style of the text.
After completing the settings, remember to name your theme and click Save.
When designing sheets, you can apply the theme by selecting it under Your custom theme. To modify or delete a theme, click the ![]() icon next to it.
icon next to it.
Note:
1. The settings for Description (Title) will only apply when the description is in the top row directly above the first field. For Description (Subtable Title), the settings will apply only when the description is in the top row directly above the Subtable.
2. When applying a custom theme to the Listing Page, if there is a Description at the top, it will use the design settings for Description (Subtable Title).
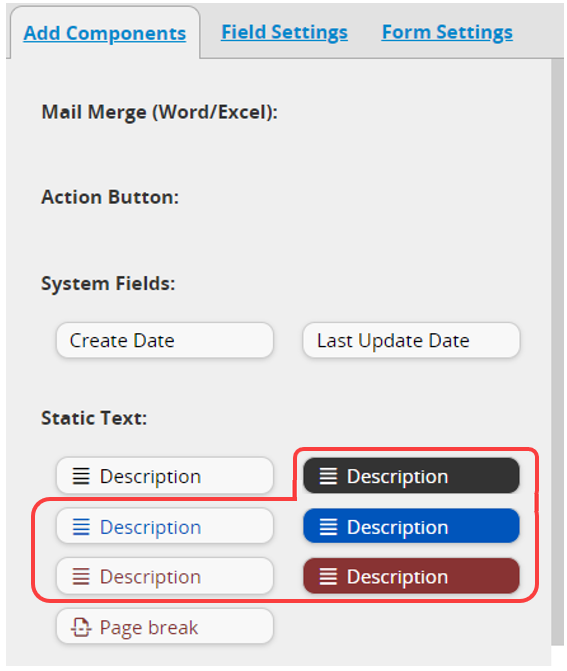
3. Descriptions added through the Add Components tab in the left toolbar will have their text and background colors take precedence over the settings in the custom theme. This may cause the custom theme to be applied incorrectly
You can move fields by dragging and dropping in the Design Mode.
If you want to move the Subtable, please refer to this section.
For formatting Static Text Fields, please refer to this section.
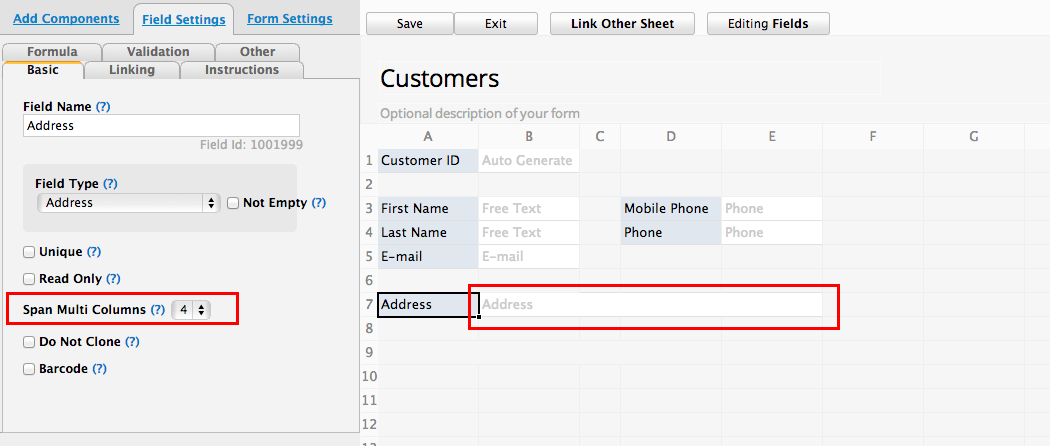
You can span fields across multiple columns by selecting Column Span (Merge Cells) option in the left sidebar under the Basic tab. It will merge the number of fields you input within the same row.
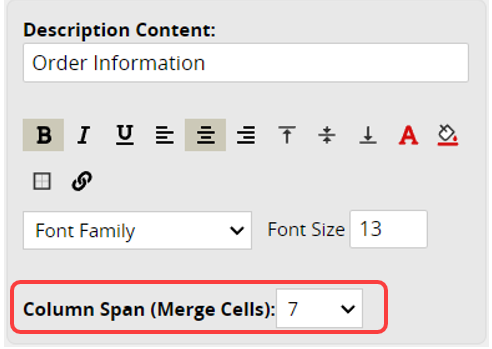
In static text fields, you can do this the same way or simply by dragging the lower-right corner of the field.
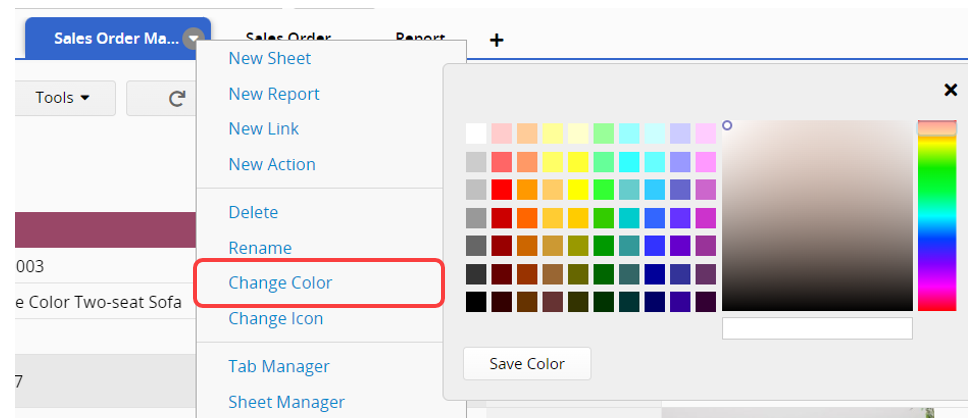
To change the color of a tab, right-click to access the context menu and select Change Color.
This will display a Color Picker, where you can choose a color swatch, or enter a hexadecimal code. Then, click Save Color to apply it.
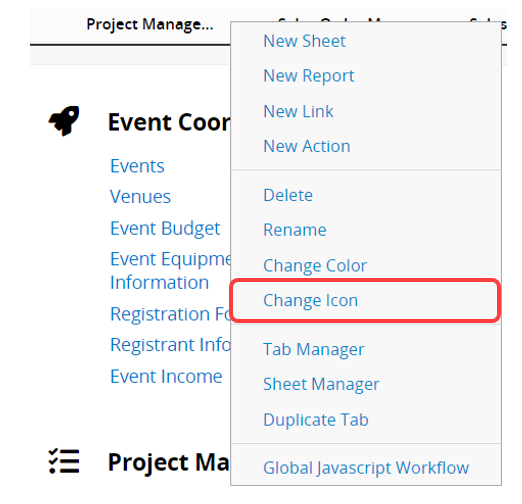
To change the Tab Icon, right-click to access the context menu and select Change Icon.
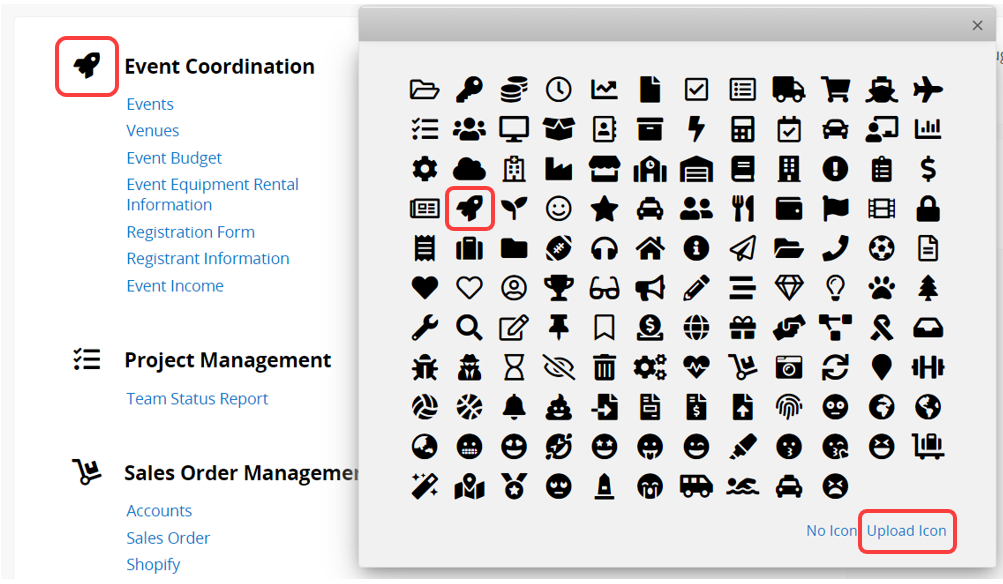
A pop-up menu will be displayed. Choose or upload the icon you would like to apply to your tab.
For a clearer demonstration, you can refer to the following tutorial video.
 Thank you for your valuable feedback!