Looking for the suitable PSI System?
If your business has:
1. Stock stored in a single location
2. A single price per product
3. A simple vendor and customer structure
4. A preference for a straightforward system
Then, the "PSI Lite" template could be the perfect solution for you. It automatically updates your stock levels when purchases or sales occur, eliminating the need for processes like inventory receipt, shipping forms, or manual stock adjustments.
If you don’t have a Ragic account, click here to sign up and install the "PSI Lite" template. This entire process is free, and we will not charge you without your consent.
If you are already a Ragic user, you can find the "PSI Lite" template under the "Template Suites" category in Install Templates and click "Install" to download it.
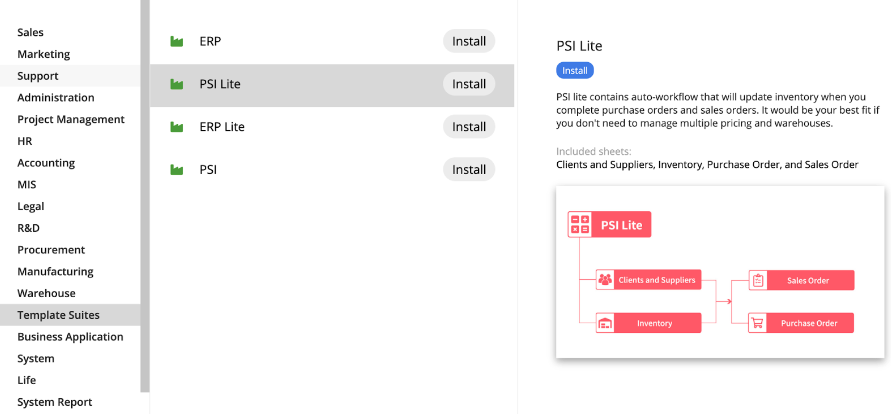
This template consists of 6 sheets, of which the "Sales Items" and "Purchase Items" sheets are read-only for the purpose of building sheet relationships. No data entry will be done in them.
Please refer to the flowchart below for the corresponding data input workflow.

This document will explain the template's structure and how to use it effectively.
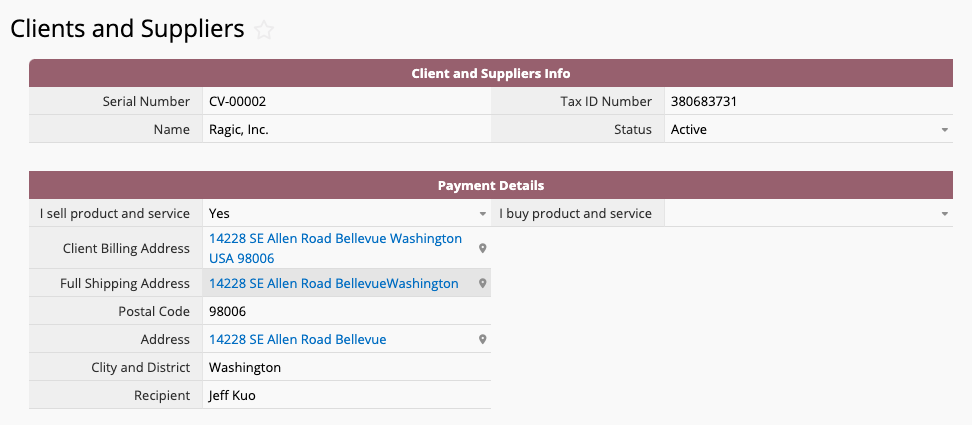
Clients and suppliers are managed within a single sheet in this template. Entries in this sheet are categorized by Status and whether you buy from or sell to each company. When entering "Inventory", "Sales Order", or "Purchase Order", you will only see the relevant clients or suppliers, which are automatically filtered based on the records in this sheet.
Serial Number will be a Unique Value for this sheet.
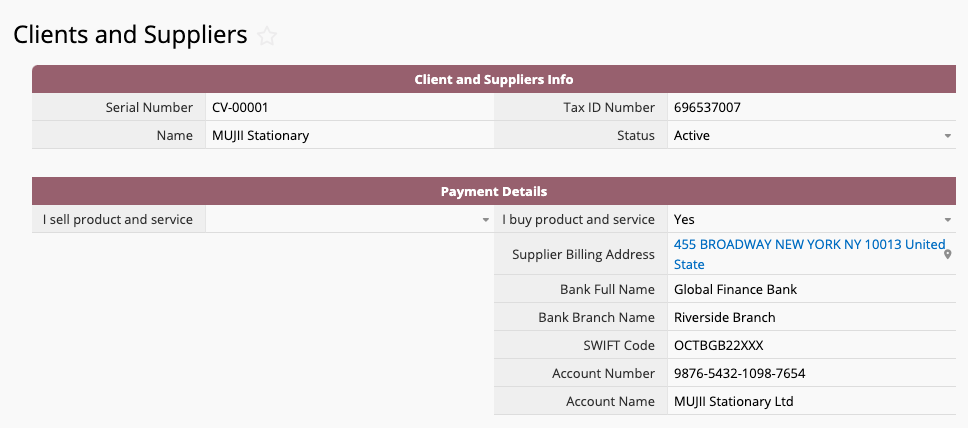
The I sell product and service and I buy product and service fields are to distinguish whether this entry belongs to a client or a supplier, so only list of suppliers will appear when you create a "Purchase Order", and only list of clients will appear when you create a "Sales Order". The same entry could be both a client and a supplier.
When you choose "Yes" in I sell product and service, the relevant fields related to shipping information will appear under.
When you choose "Yes" in I buy product and service, the relevant fields related to billing information will appear under.
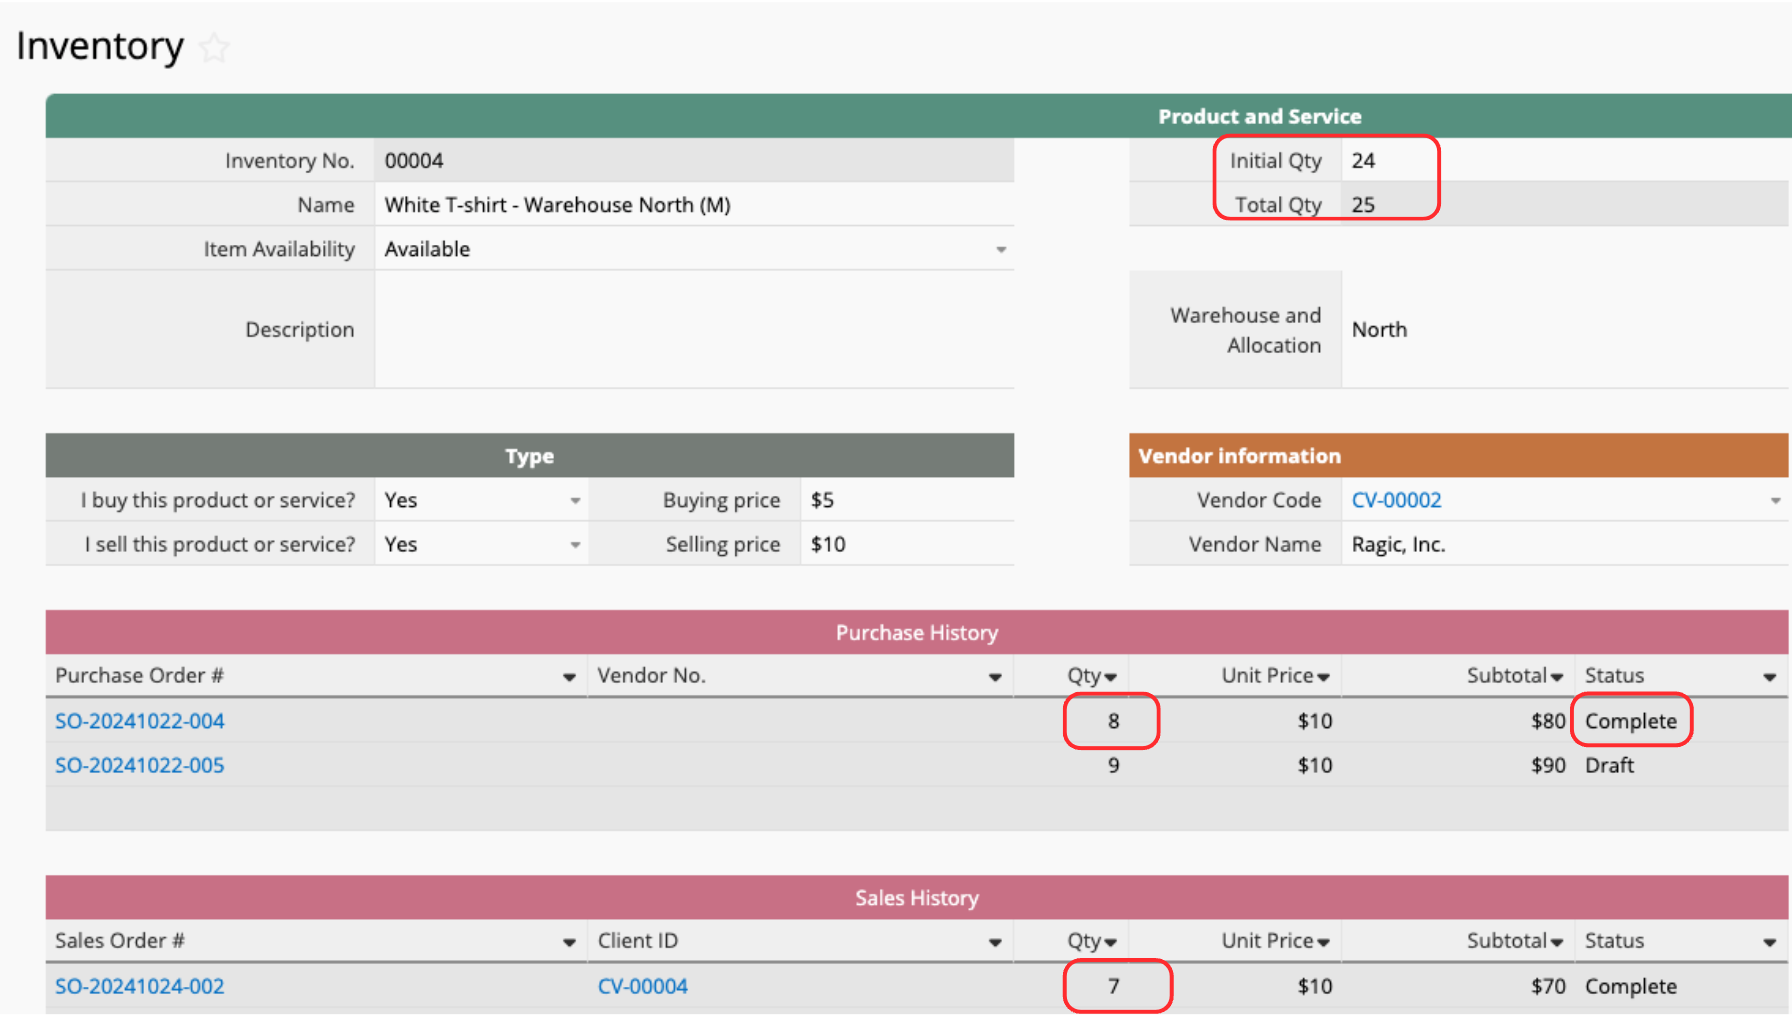
This "Inventory" sheet will handle your product name, vendor you purchased this product from, inventory in, and inventory out. Subtables below will record your purchase and sales history, and automatically deduct and increase your inventory according to the purchase or sales status.
In this sheet, the Inventory No. is a Unique Value automatically generated. The two options under Type — I buy this product/service and I sell this product/service — represent purchasing from suppliers and selling to customers, respectively. If either of these fields is set to "Yes", additional fields for recording the Buying Price or Selling Price will appear accordingly.
When creating an Inventory entry, make sure the "Initial Qty" is accurately filled in. This value will serve as the baseline for future stock calculation. As you log purchases and sales, the system will add or subtract from this starting amount as your "Total Qty".
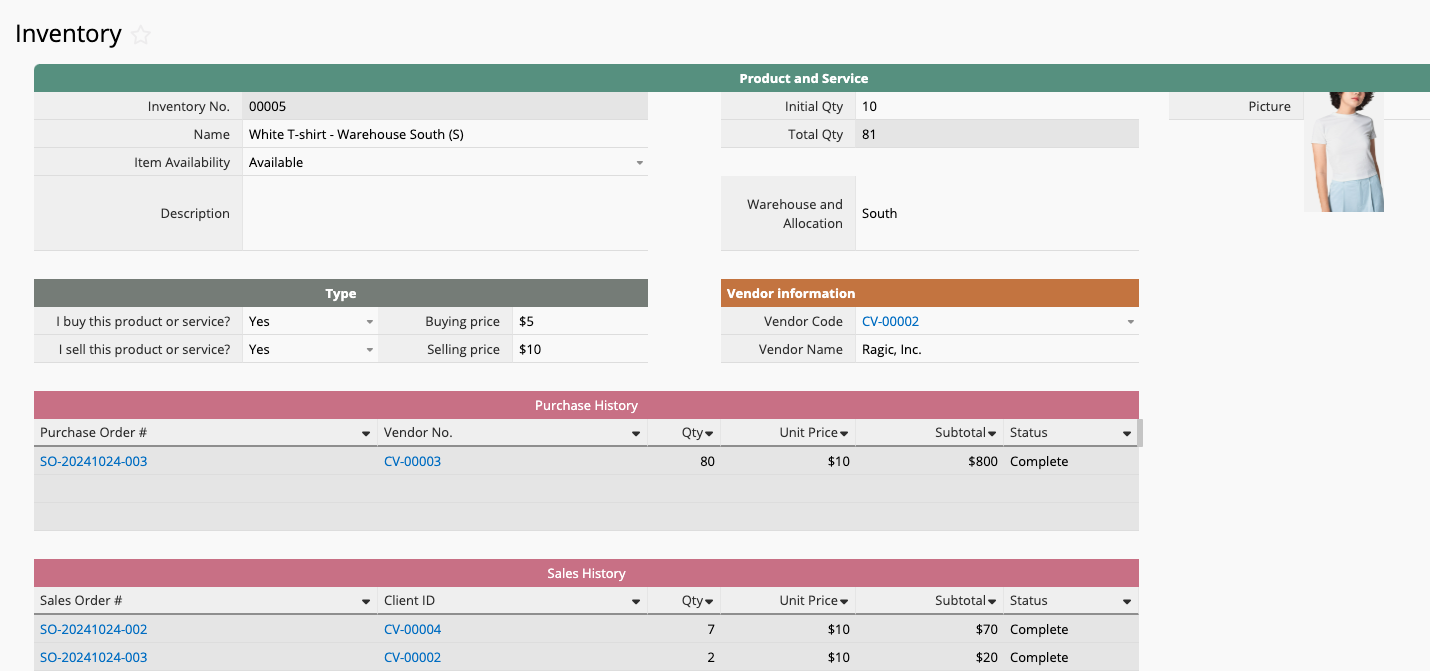
Please note that the "PSI Lite" template does not support product specification tracking. If a product has multiple sizes or variations, you’ll need to create separate entries for each. For example, if a White T-Shirt comes in two sizes, M and S, you’ll need to create individual entries for each size.

The "PSI Lite" template also does not support multiple "warehouse management". If you have multiple warehouses or a wide variety of products, consider upgrading to the "FULL version of the PSI" template for better support with product specifications and warehouse management.
If you prefer to stick with the "PSI Lite" template and only occasionally store the same product in different warehouses, you’ll need to create separate entries for each product in each warehouse to ensure accurate inventory tracking.

The Sales Order # in each "Sales Order" is a Unique Value, generated automatically and cannot be duplicated.
Customer-related information is linked to the "Clients and Suppliers" sheet. By choosing a "Client ID", related details like the "Client Name", "Contact Name", "Phone Number", will be filled in automatically. Note that the system will only load entries from the "Clients and Suppliers" sheet where the I sell product and service is filled in as "Yes".

The Subtable below records the sales items for the order. If there are many items, the Subtable will automatically expand.
The "Product No." field is linked to the "Inventory" sheet. Once selected, the system will automatically load the "Selling Price" from "Inventory" sheet to "Unit Price" in this "Sales Order" Subtable field. After entering the quantity, the system will calculate the "Subtotal" and "Grand Total". If necessary, you can also add the values in "Discount %" (Remember to add % for the calculation to work accurately), "Tax", "Shipping/Handling" cost, according to your needs.

After saving the entry and returning to the "Inventory" Sheet, you will notice that this order has already appeared in the "Sales History" Subtable. However, the inventory "Total Qty" will not change until this "Sales Order Status" is marked as "Complete".
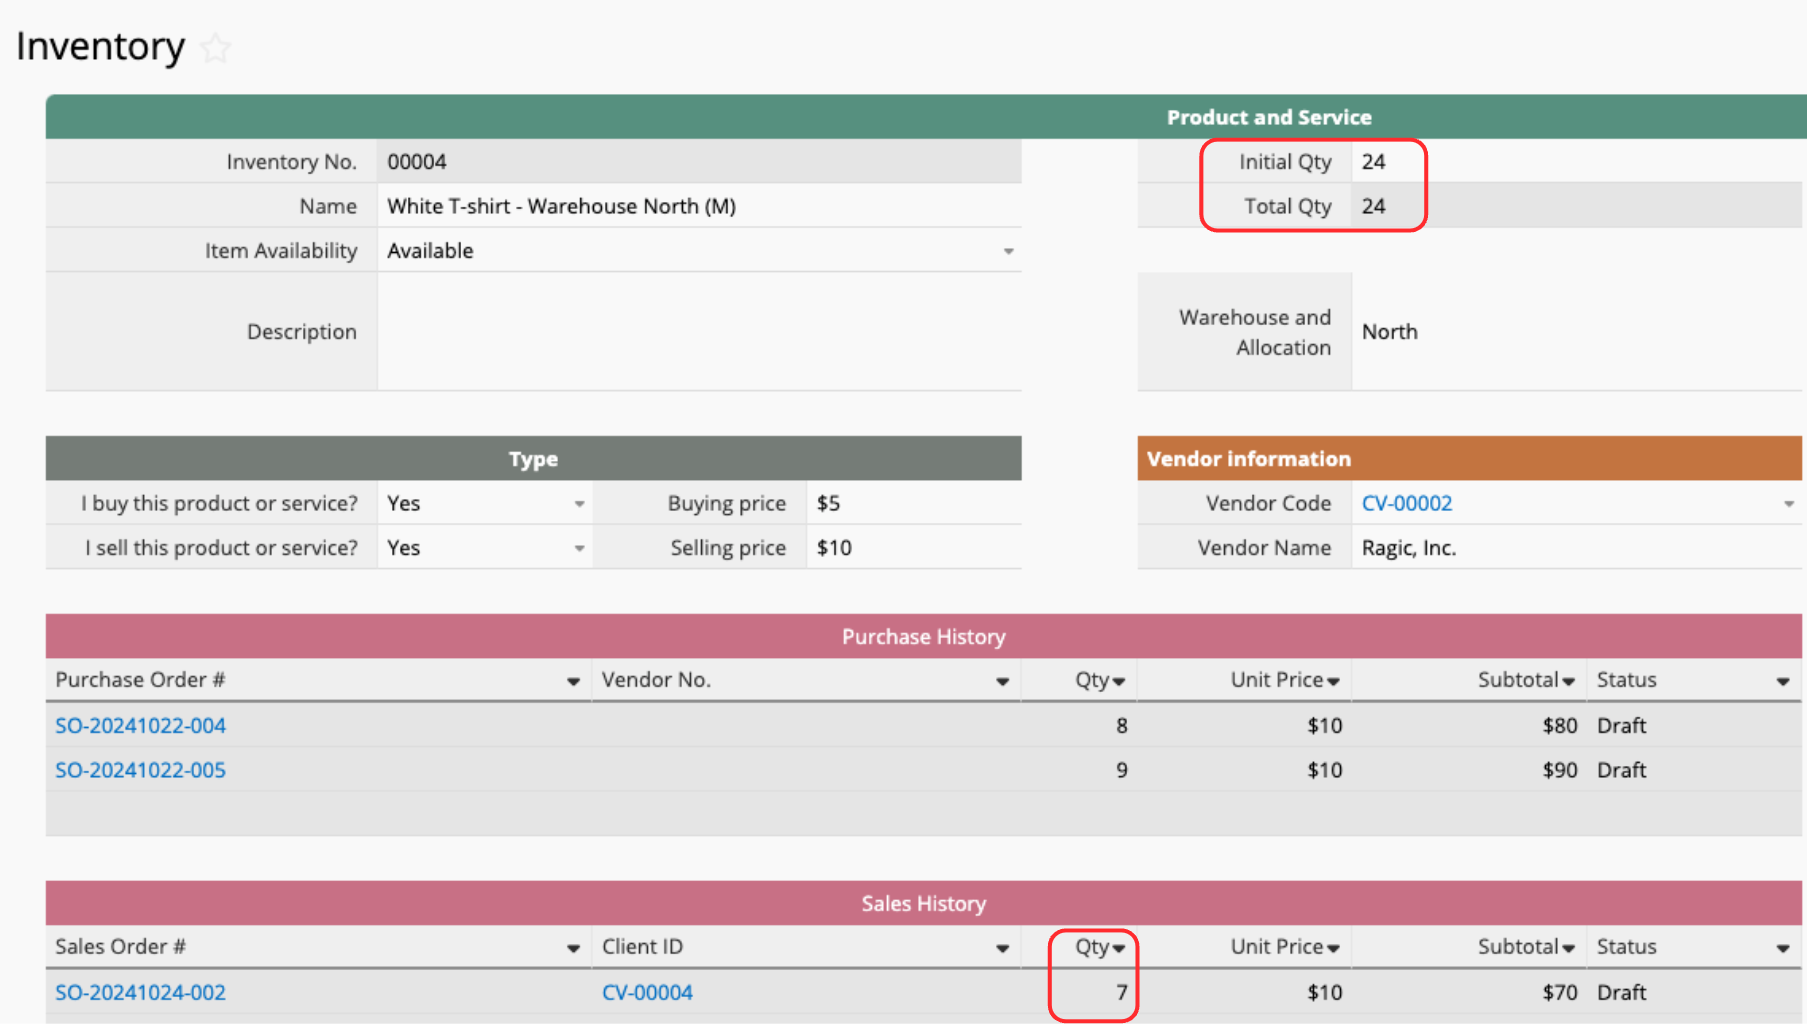
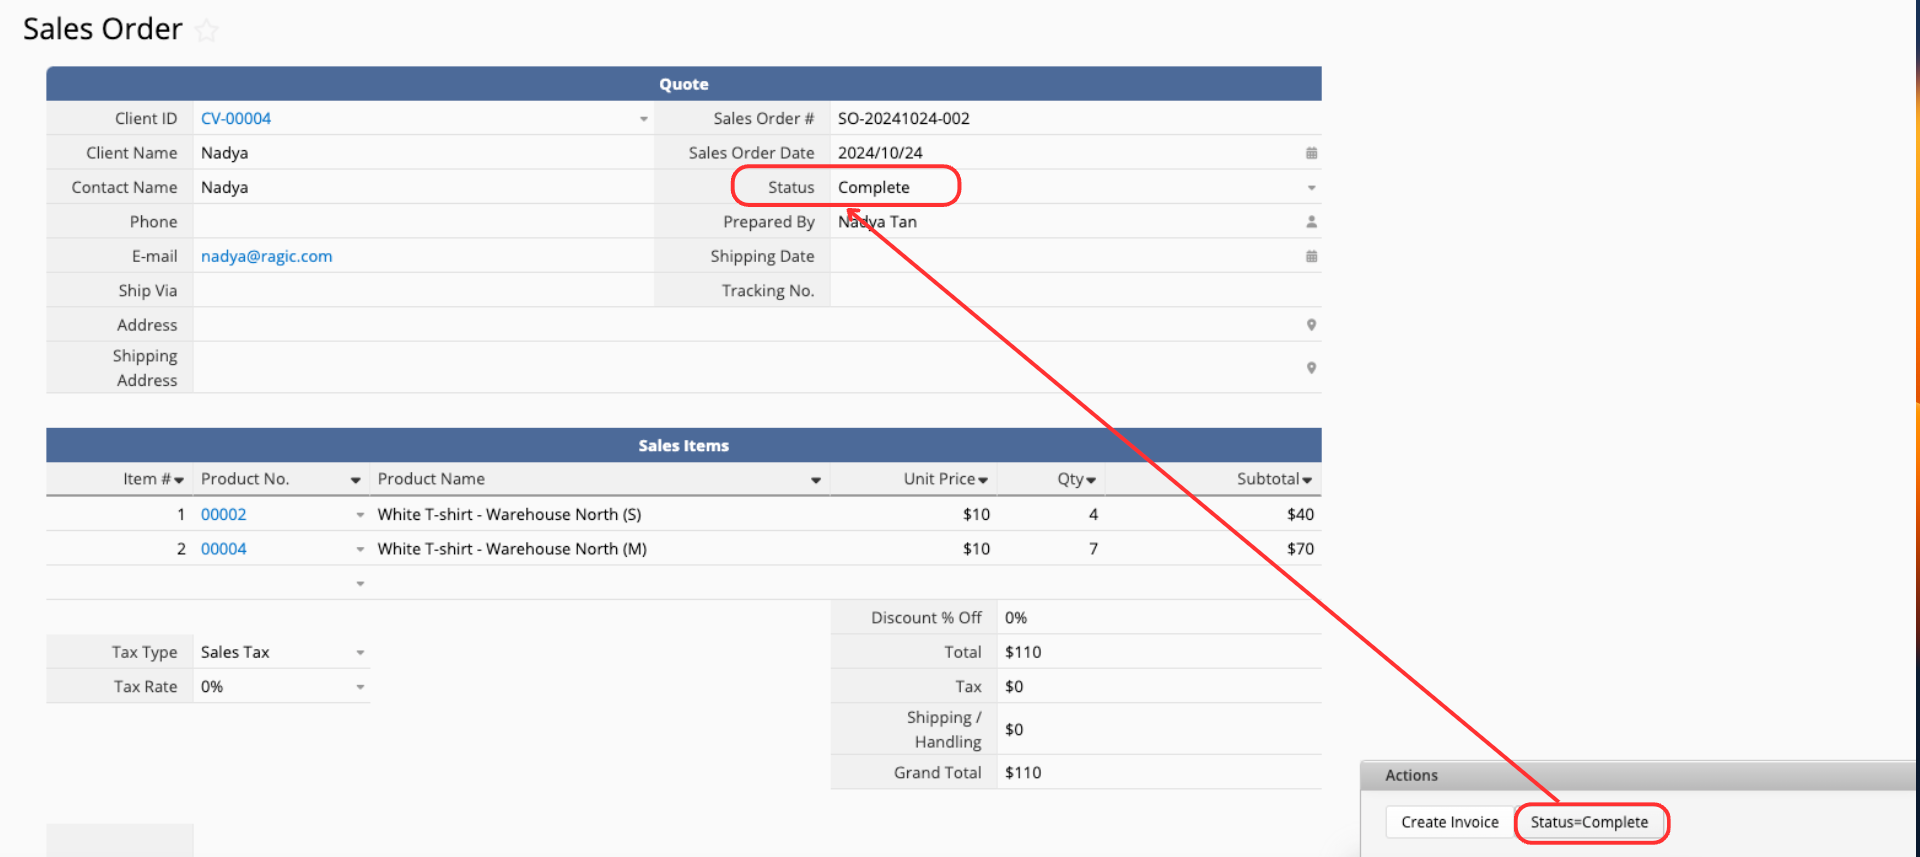
To change the "Status" field as "Complete" and proceed to inventory calculation, you can manually change this field value or you can also use the Action Button to change the status to "Complete" in a single click every time a "Sales Order" is finalized.
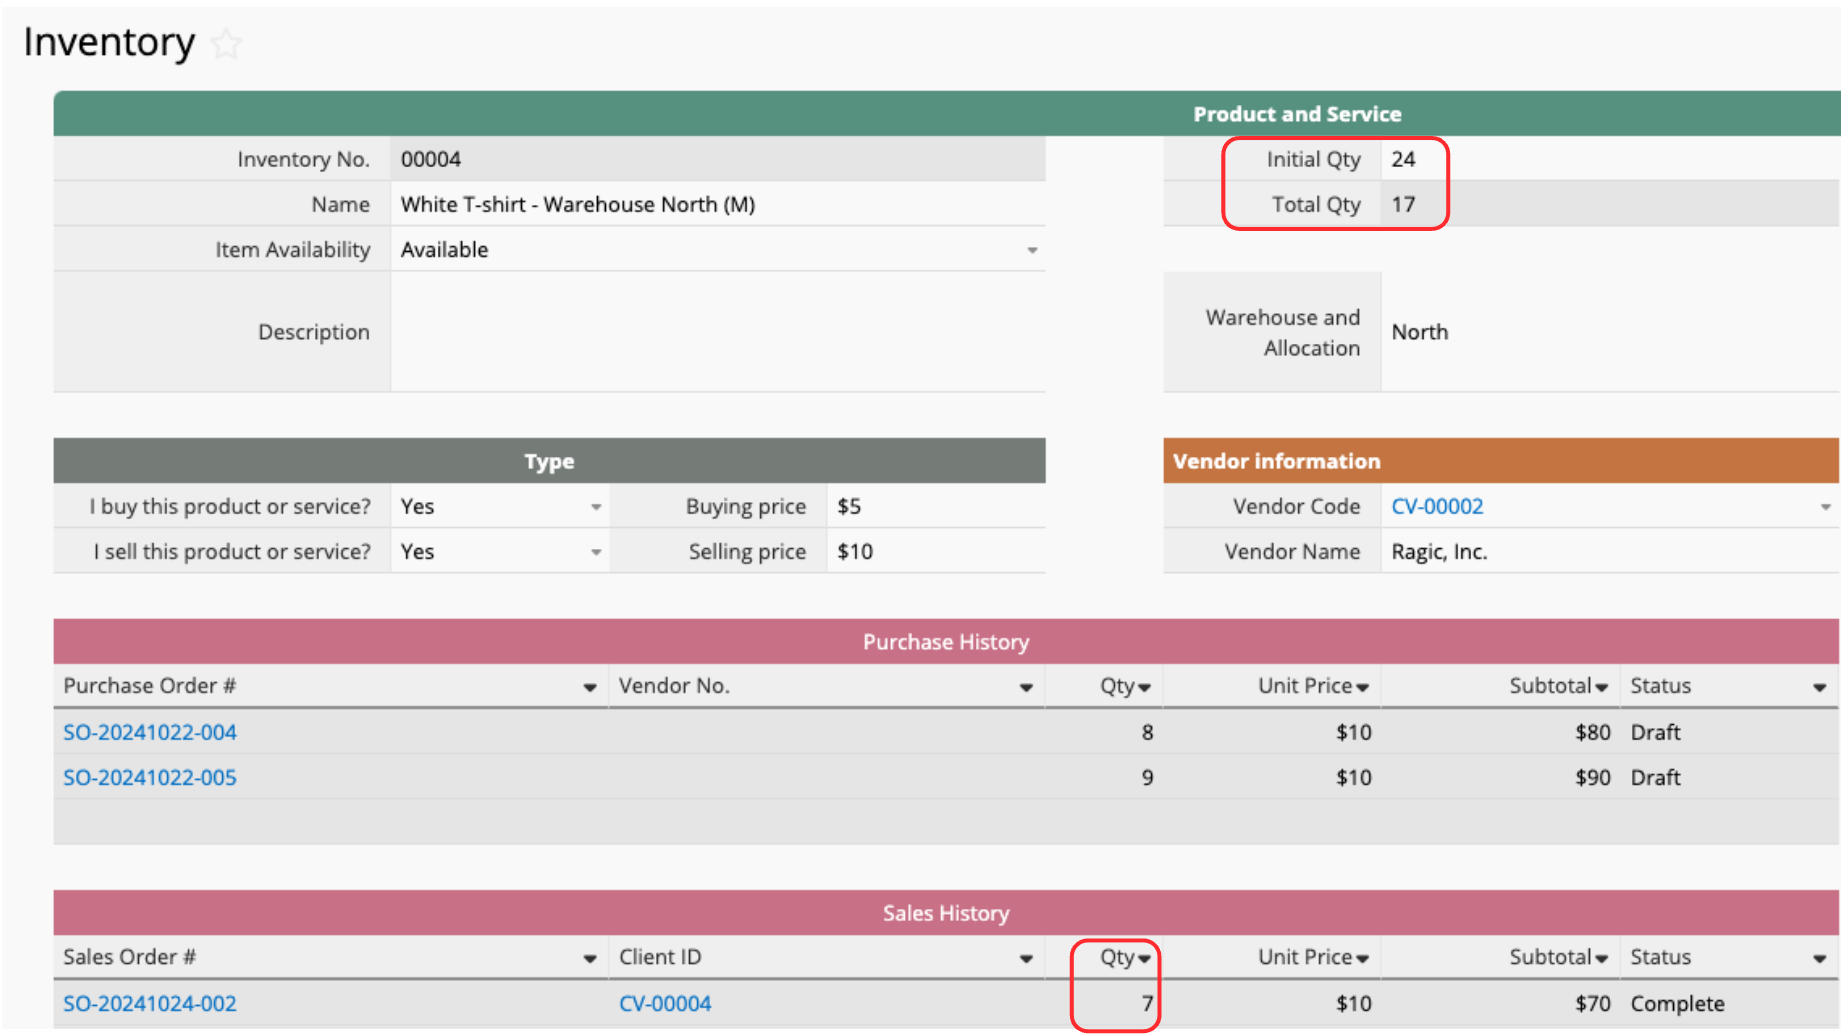
After the "Status" change, you can now see that the "Inventory" is updated! (24-7 = 17)
The way "Purchase Order" works is pretty much the same as "Sales Order". Each Purchase Order # is Unique Value, automatically generated when you create a "Purchase Order" entry, and can’t be duplicated.
The "Vendor No. " is also linked to the "Clients and Suppliers" sheet. Just click and select a vendor, and it’ll automatically fill in the "Vendor Name", "Contact Person", "Phone", and other related info. This Link and Load will filter data in the "Clients and Suppliers" sheet where I buy products and services is set to "Yes".

The Subtable below is for recording the purchase items. The "Product ID" is linked to the "Inventory" sheet, so when you select a product, the "Buying Price" will automatically populate in the "Unit Price" field. Just like in the "Sales Order", once you enter the "Quantity", the system will calculate the "Subtotal" and "Grand Total". You can also adjust the "Tax and Shipping" Cost as needed.

After saving the data, you can return to the "Inventory" sheet and see that this purchase has also been updated in the "Purchase History". However, just like with sales, the inventory quantity won’t change until the "Purchase" is complete (right now, it’s still 17 from the last completed "Sales Order").
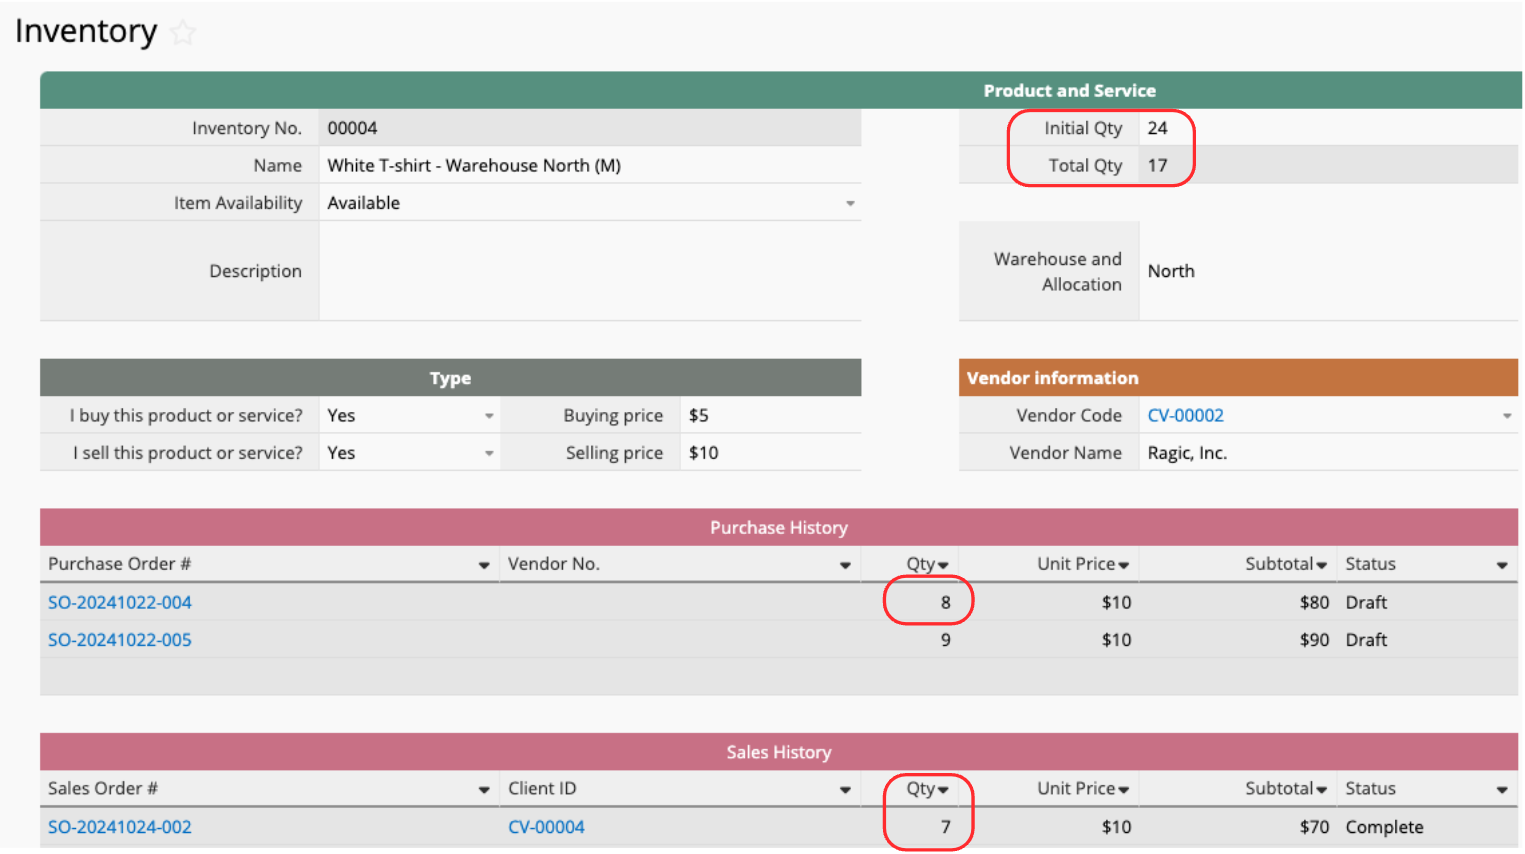
Once you change the "Status" of the "Purchase Order", then the "Total Qty" will increase according to the quantity you purchased.
If you would like to understand more about the relationship between each sheet and the tools used to build this template, you can watch the video tutorial below.
 Thank you for your valuable feedback!